When you spend a lot of money on a brand-new bike, you would hope/assume that it arrives with you in basically perfect condition and you can just ride off happily into the sunset together. While for many of us, that is exactly the case, for some of us, the arrival of a new bike is just an excuse to spend some time in the garage/shed/workshop/kitchen making minor tweaks and adjustments to make your perfect bike even more perfect. Olly digs out his toolbox and mechanics apron and gazes into the world of bike pimping.
“How is your front mudguard attached?” said my friend Francis as he rode alongside me on a recent ride. “Helitape and double-sided heavy-duty Velcro on the inside of the fork legs” was my response. I was surprisingly happy about Francis’ question because it showed that the frankly ridiculous amount of time that I spent hiding in my garage making minute tweaks to my bike had paid off and they are actually noticed/appreciated by someone else.
Before (image courtesy of Canyon)
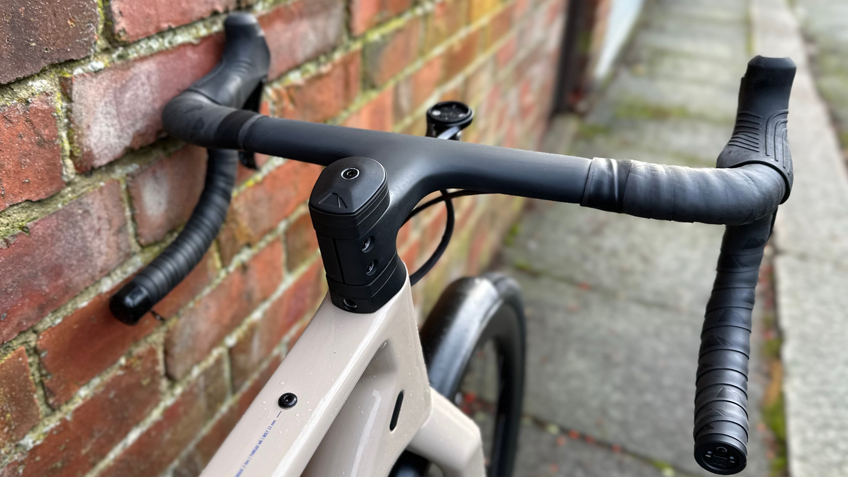
After
In the petrol-guzzling world of car enthusiasts, “modding” is a well-established pastime/hobby/obsession of many and provides gainful employment via a multitude of businesses either selling #doodads to make your car shinier/faster/lower/noisier, or actually fitting said doodads to your four-wheeled money-pit of choice. While in the bike world, this is perhaps slightly less common, making tweaks to your bike set-up is still a well-loved pastime of many cyclists across the globe. While there probably are women who enjoy spending an evening up to their eyebrows in heat-shrink, coloured cable end caps and über-expensive sheets of helitape, I suspect this fascination with making our bikes infinitesimally better is mainly a male-dominated pastime.
For anyone still reading at this point, you might wonder what the hell bike modding is all about. Like most addictions, it normally starts off with something small-scale and harmless. Perhaps you upgraded your saddle to something more comfortable. Or you have a preferred brand of bottle cage. Or your shoes are all fitted with SPD cleats from one particular brand, so you fit the same type of pedals to each of your different bikes. But it’s not long before this gentle and relatively inexpensive tweaking becomes something a little more hardcore. At first, you’ll just want to upgrade your tyres to a tubeless set-up. Next, you’ll decide the level of cushioning provided by your handlebar tape isn’t quite right. Before you know it, you’ll be spending your life savings investing in a new rear derailleur cage and jockey wheels fitted with ceramic bearings in an attempt to save a whopping 25g of weight and you’ll lose entire days of your life trying to figure out the perfect internal routing setup for your cables and hoses.
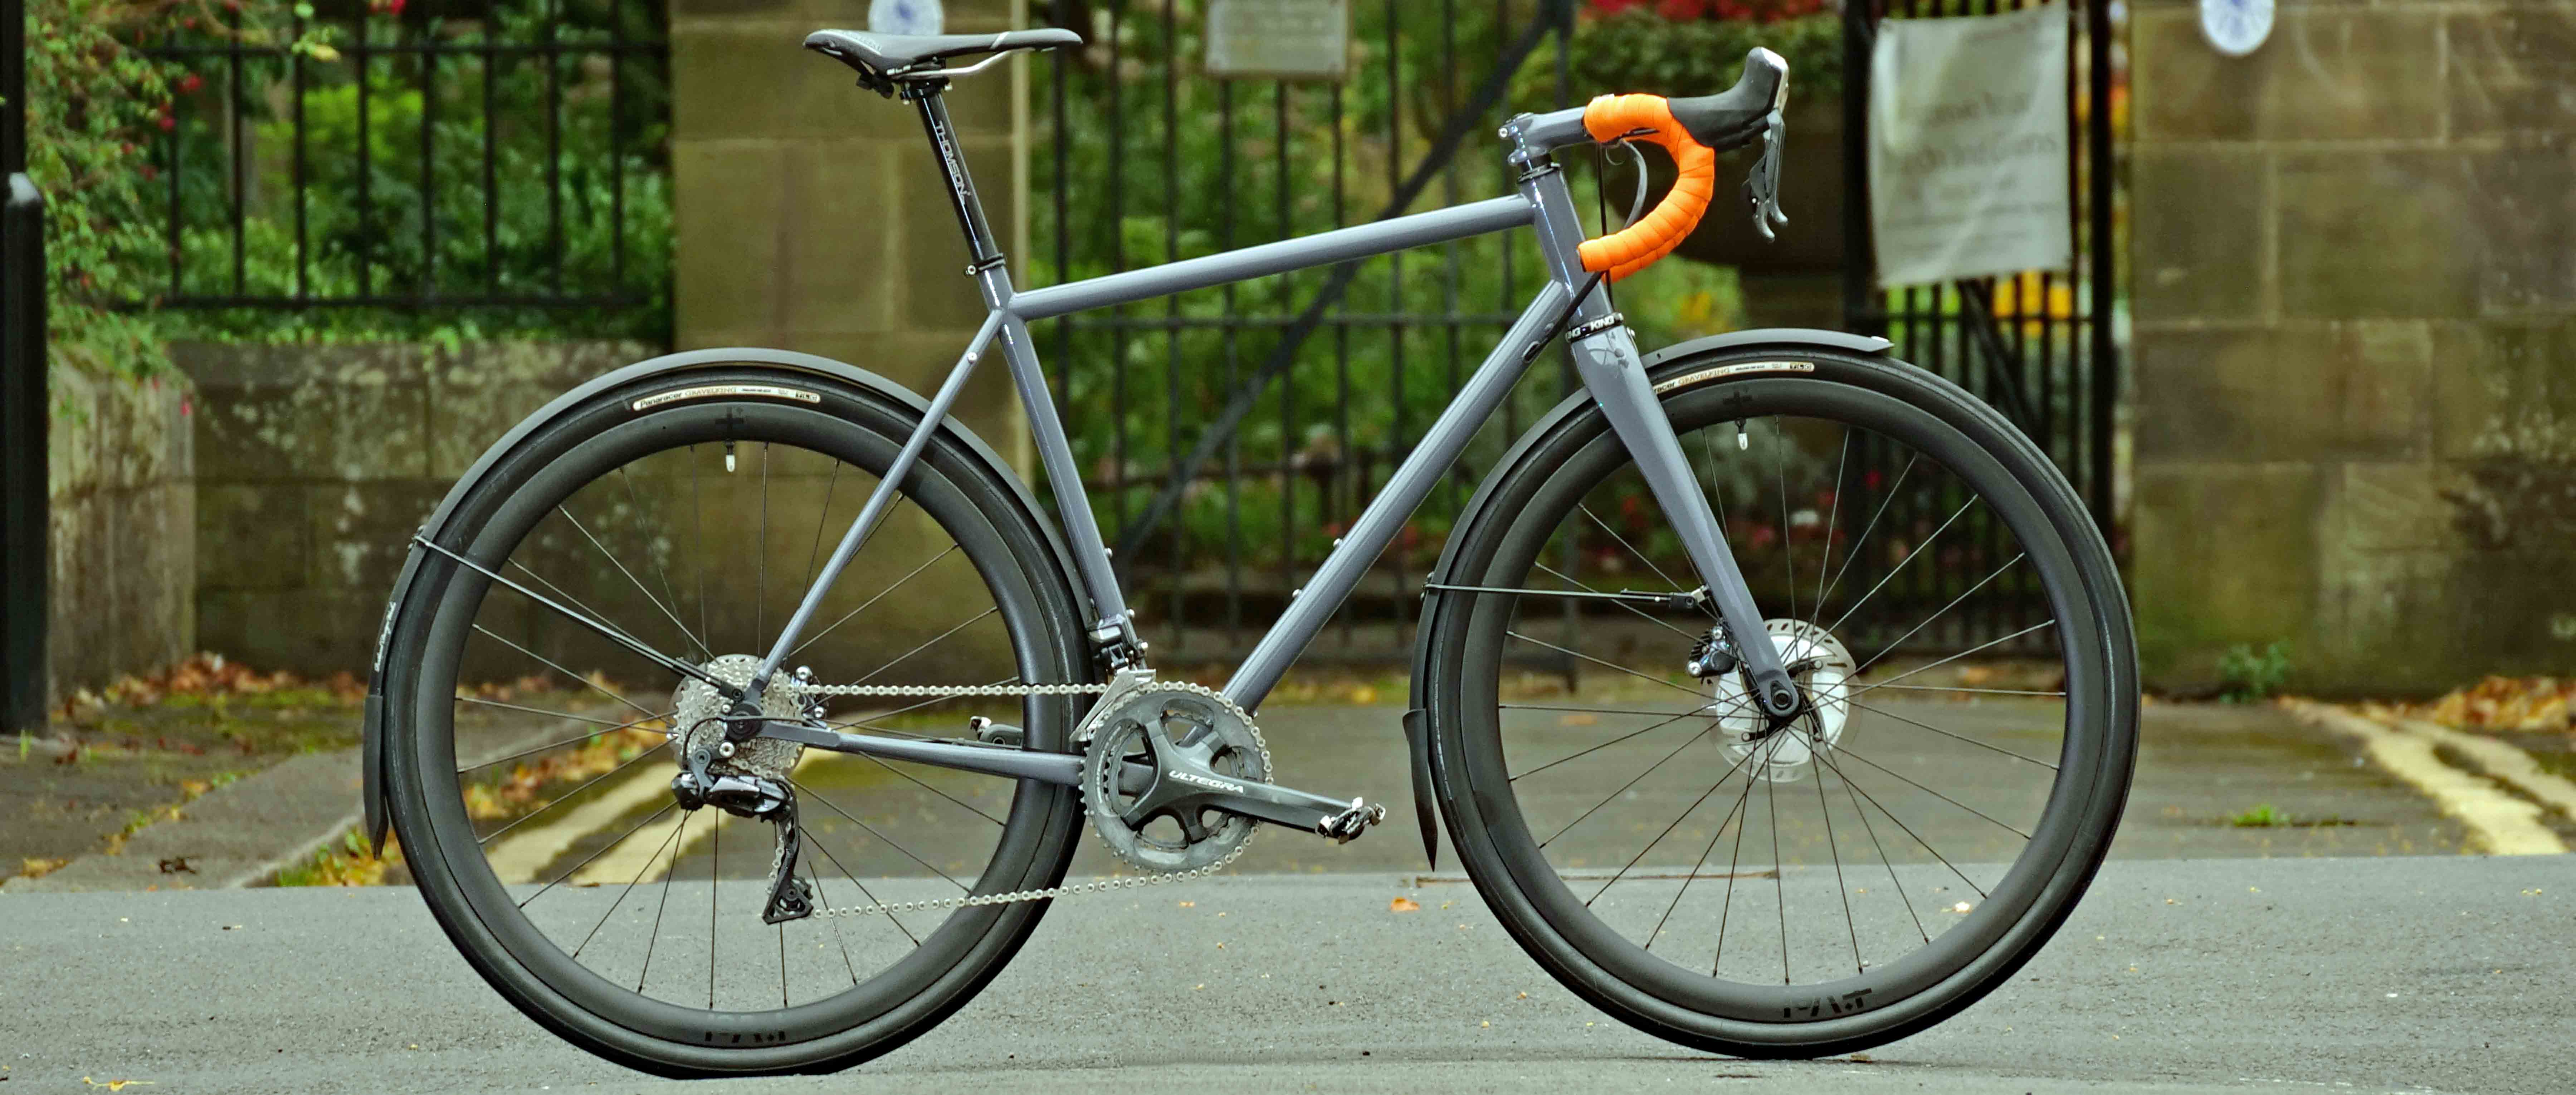
While this all might sound a) a little odd b) time-consuming and c) expensive, there are some definite benefits in tweaking your set-up to make it “just right” for you. I recently purchased, with my own hard-earned cash, a new bike. As with any big financial outlay, I spent a long time considering my options before making my final decision, weighing up the pros and cons of different brands and figuring out exactly which bike would suit my needs the best.
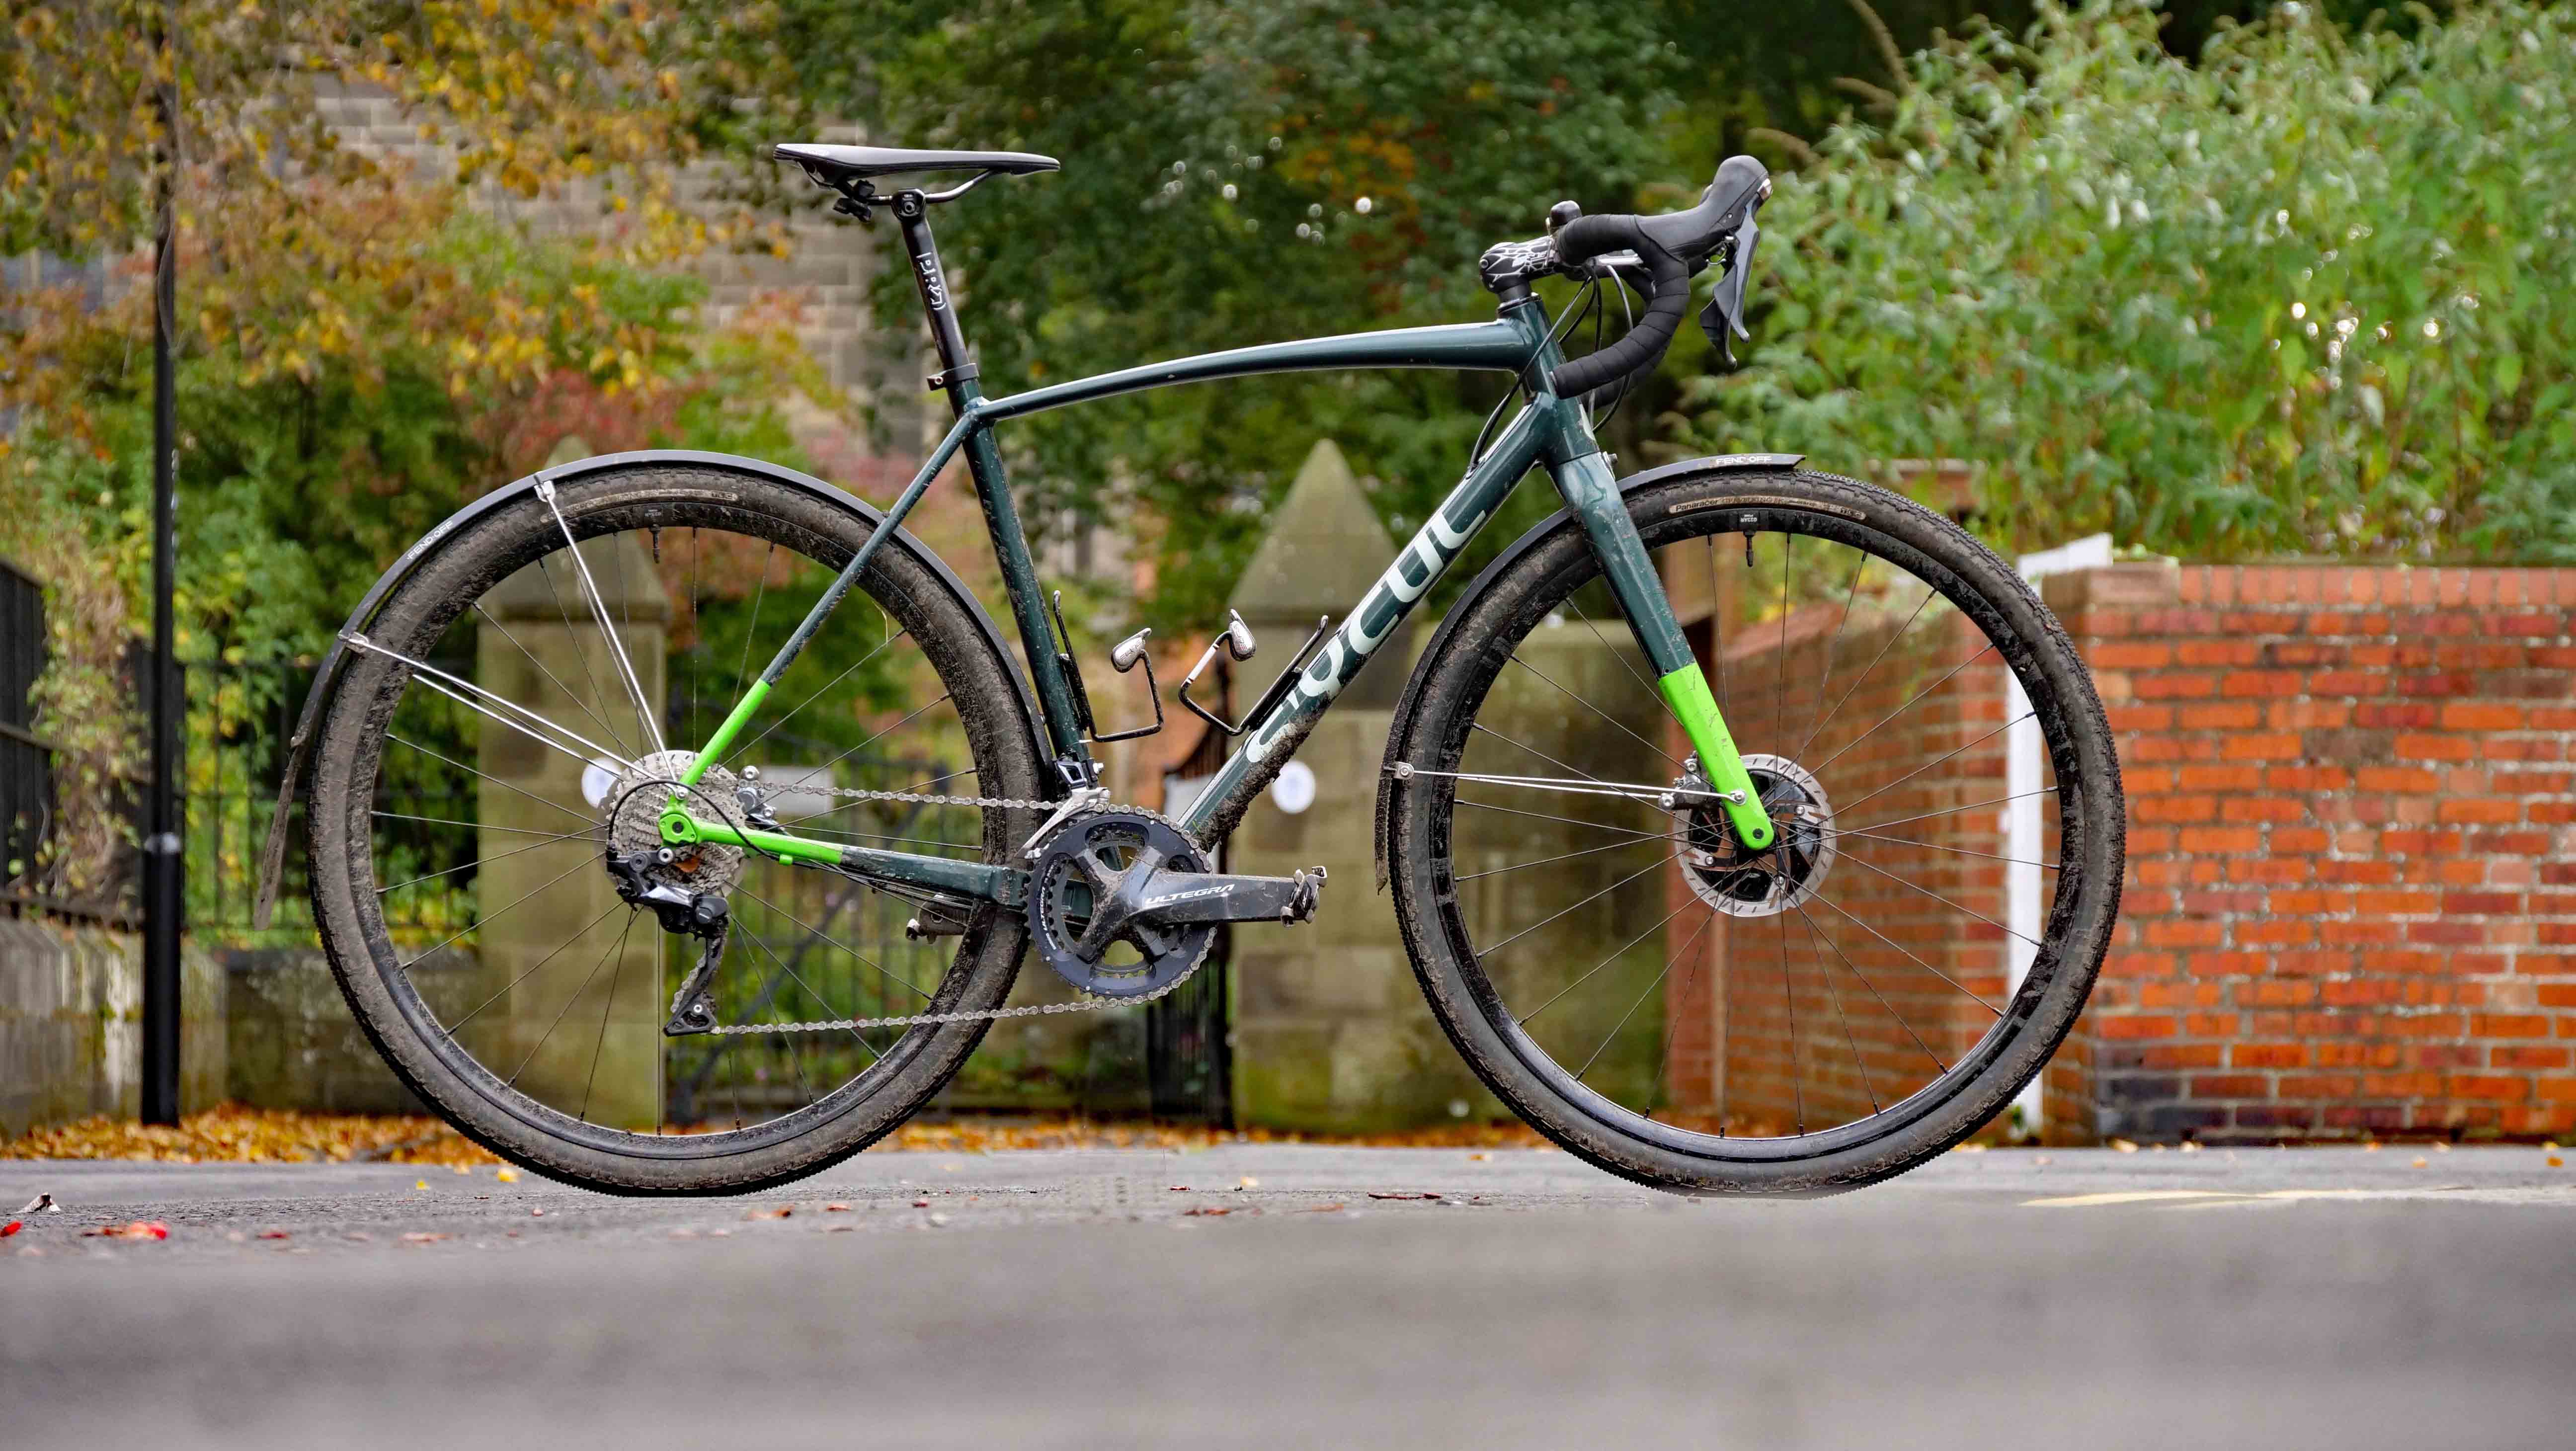
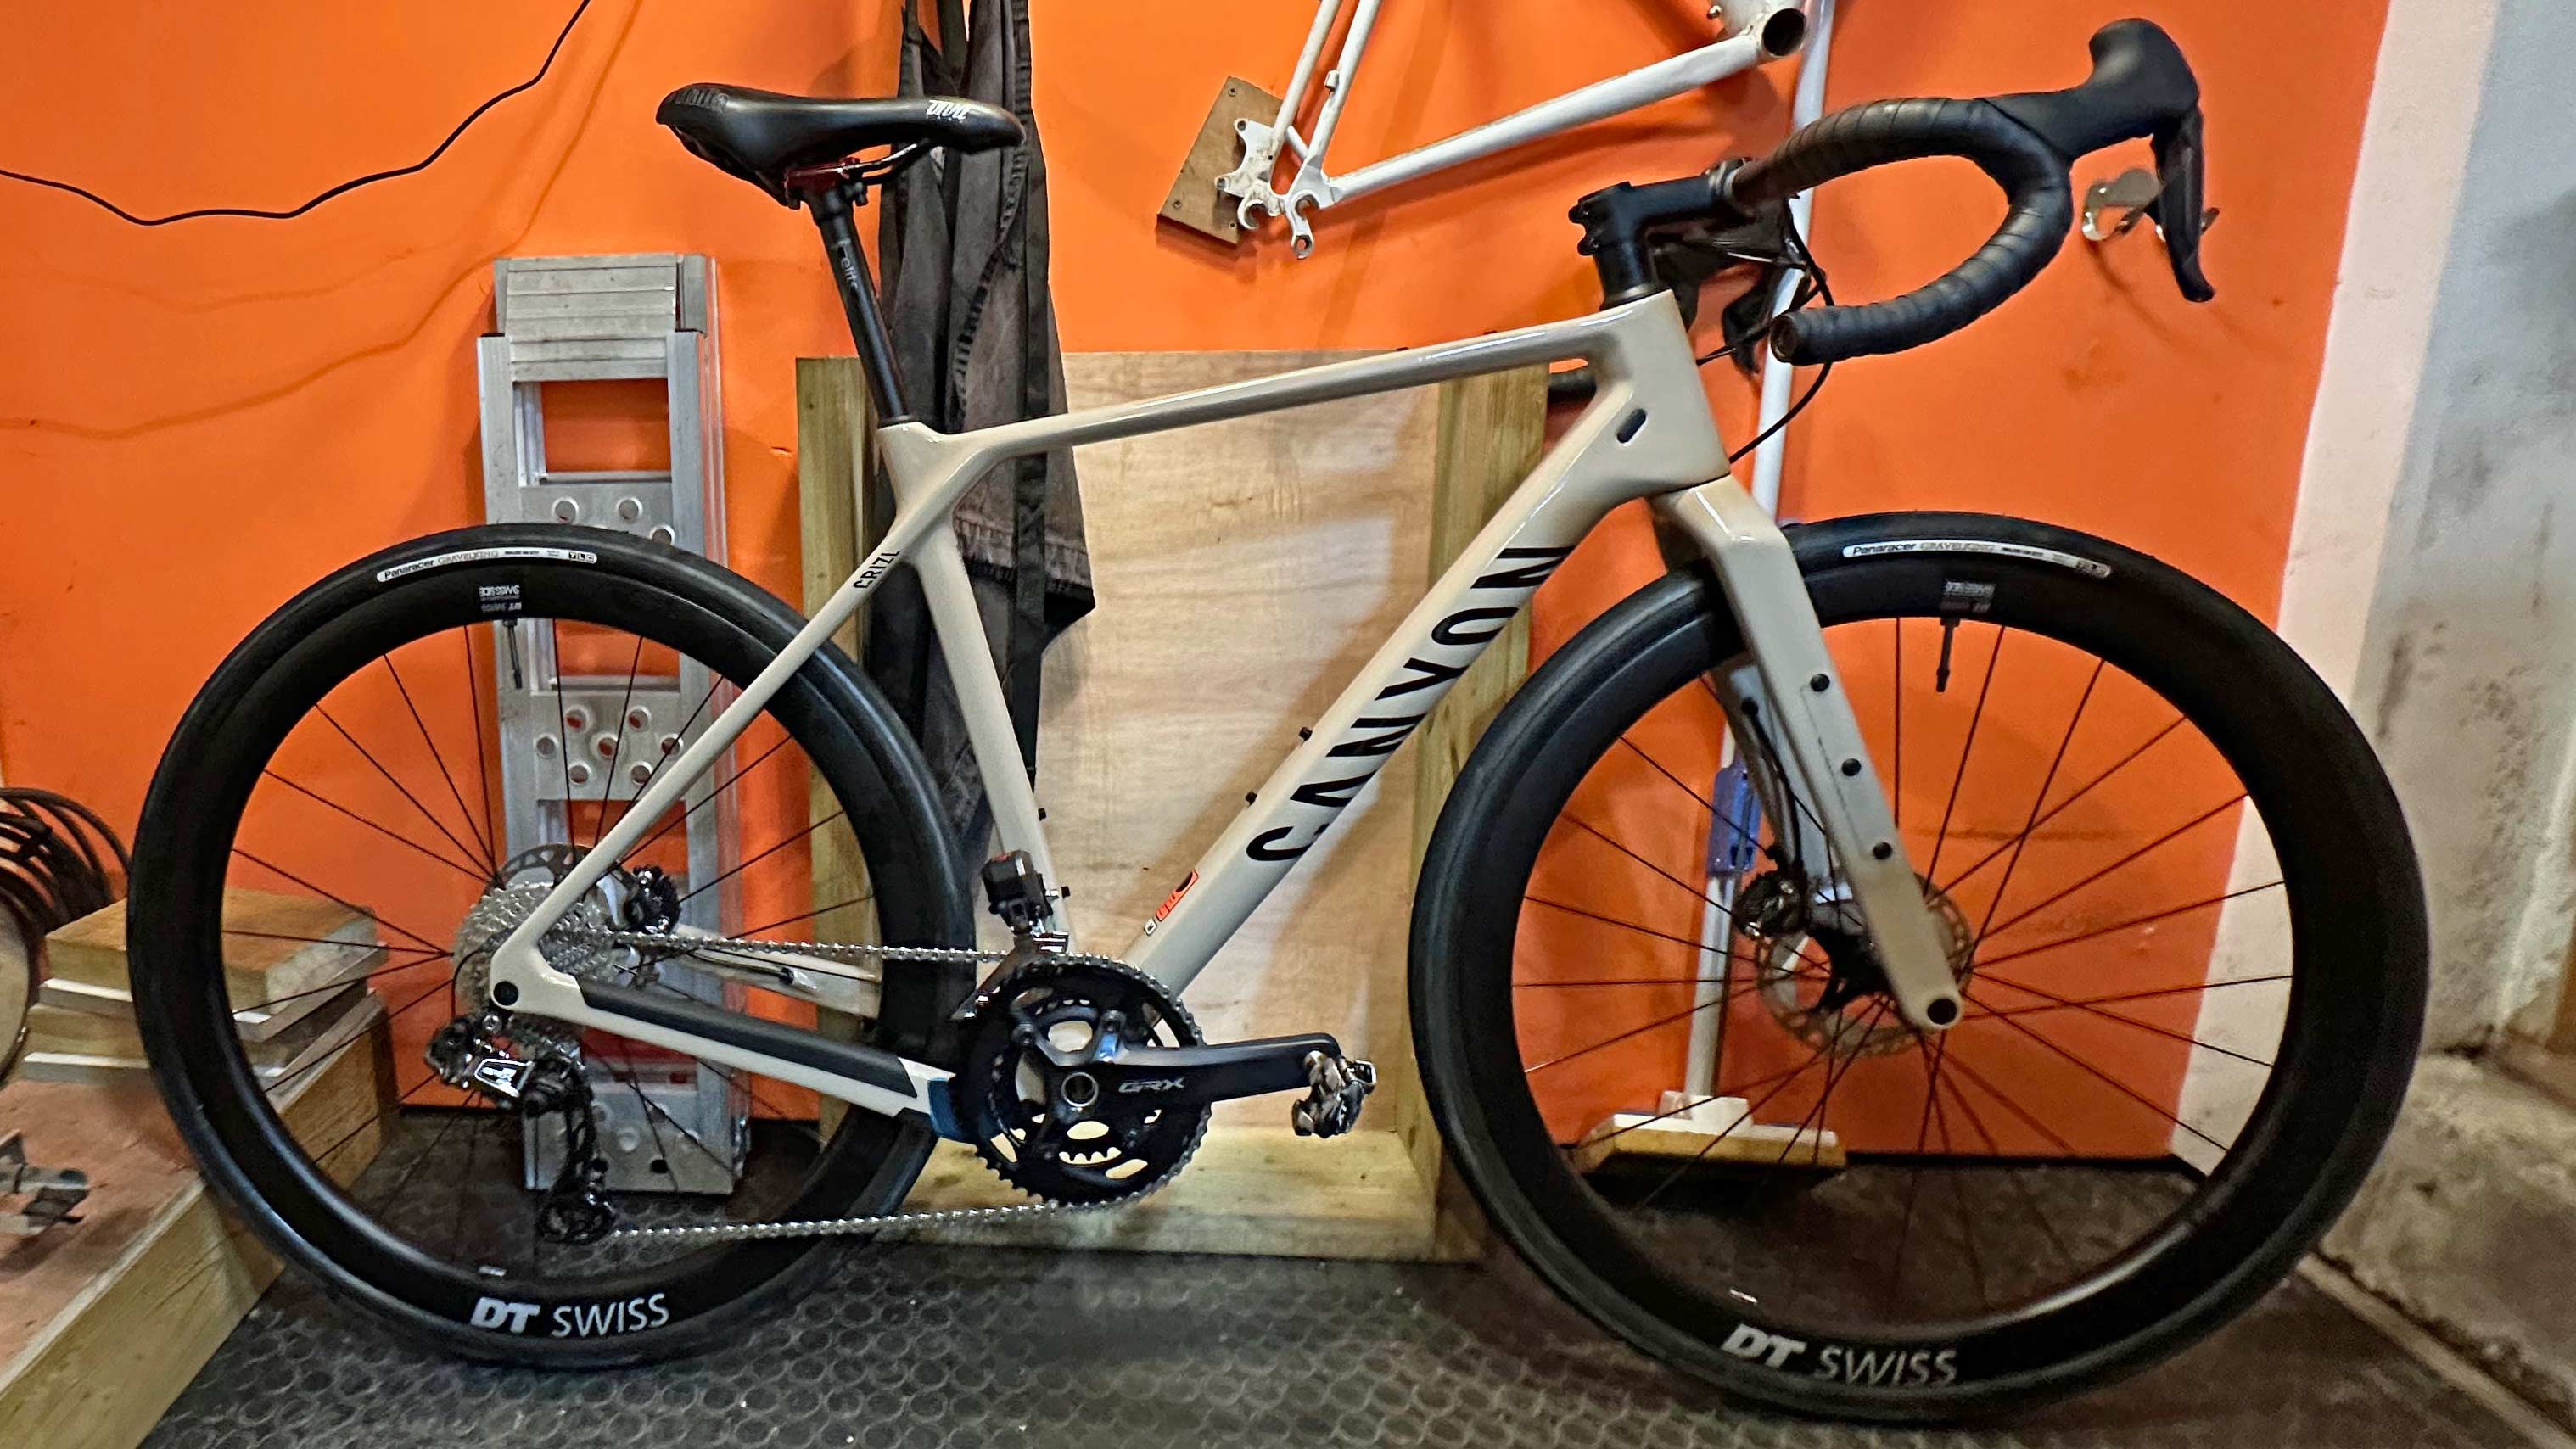
Previous "All-road" custom build
I had quite a strange mental shopping list. I was going to be creating an ‘all-road” bike. This is a kind of middle ground between a full-on road race bike, an old-fashioned touring bike and an all-singing-all-dancing gravel bike. I planned on using the bike year-round, so it needed to be fully winterised and the vast majority of the time I would be riding it on the minor roads of Northumberland. As befits a rural county located in the far north of England, the weather is generally rubbish and the traffic, albeit light, comprises a high proportion of heavy agricultural vehicles which smash the hell out of the road surface. This means that potholes, gravel, mud, cow dung, surface cracks and Olympic-swimming-pool-sized puddles are all common occurrences on my weekly rides.
My list of requirements was therefore as follows:
- Clearance for BIG volume road tyres
- Mudguard mounts
- Disc brake compatible (obviously)
- It needed to have a 2x Di2 groupset as I was completely hooked on this already.
- Comfy-but-fast-handling frame and forks.
- Having tried a range of carbon fibre bikes in the past, this was my preferred material of choice.
- Good looking (although this is very much in the eye of the beholder)
- In stock (or with only a short waiting list)
- Not so expensive that I would need to trade in both my kidneys in order to afford it.
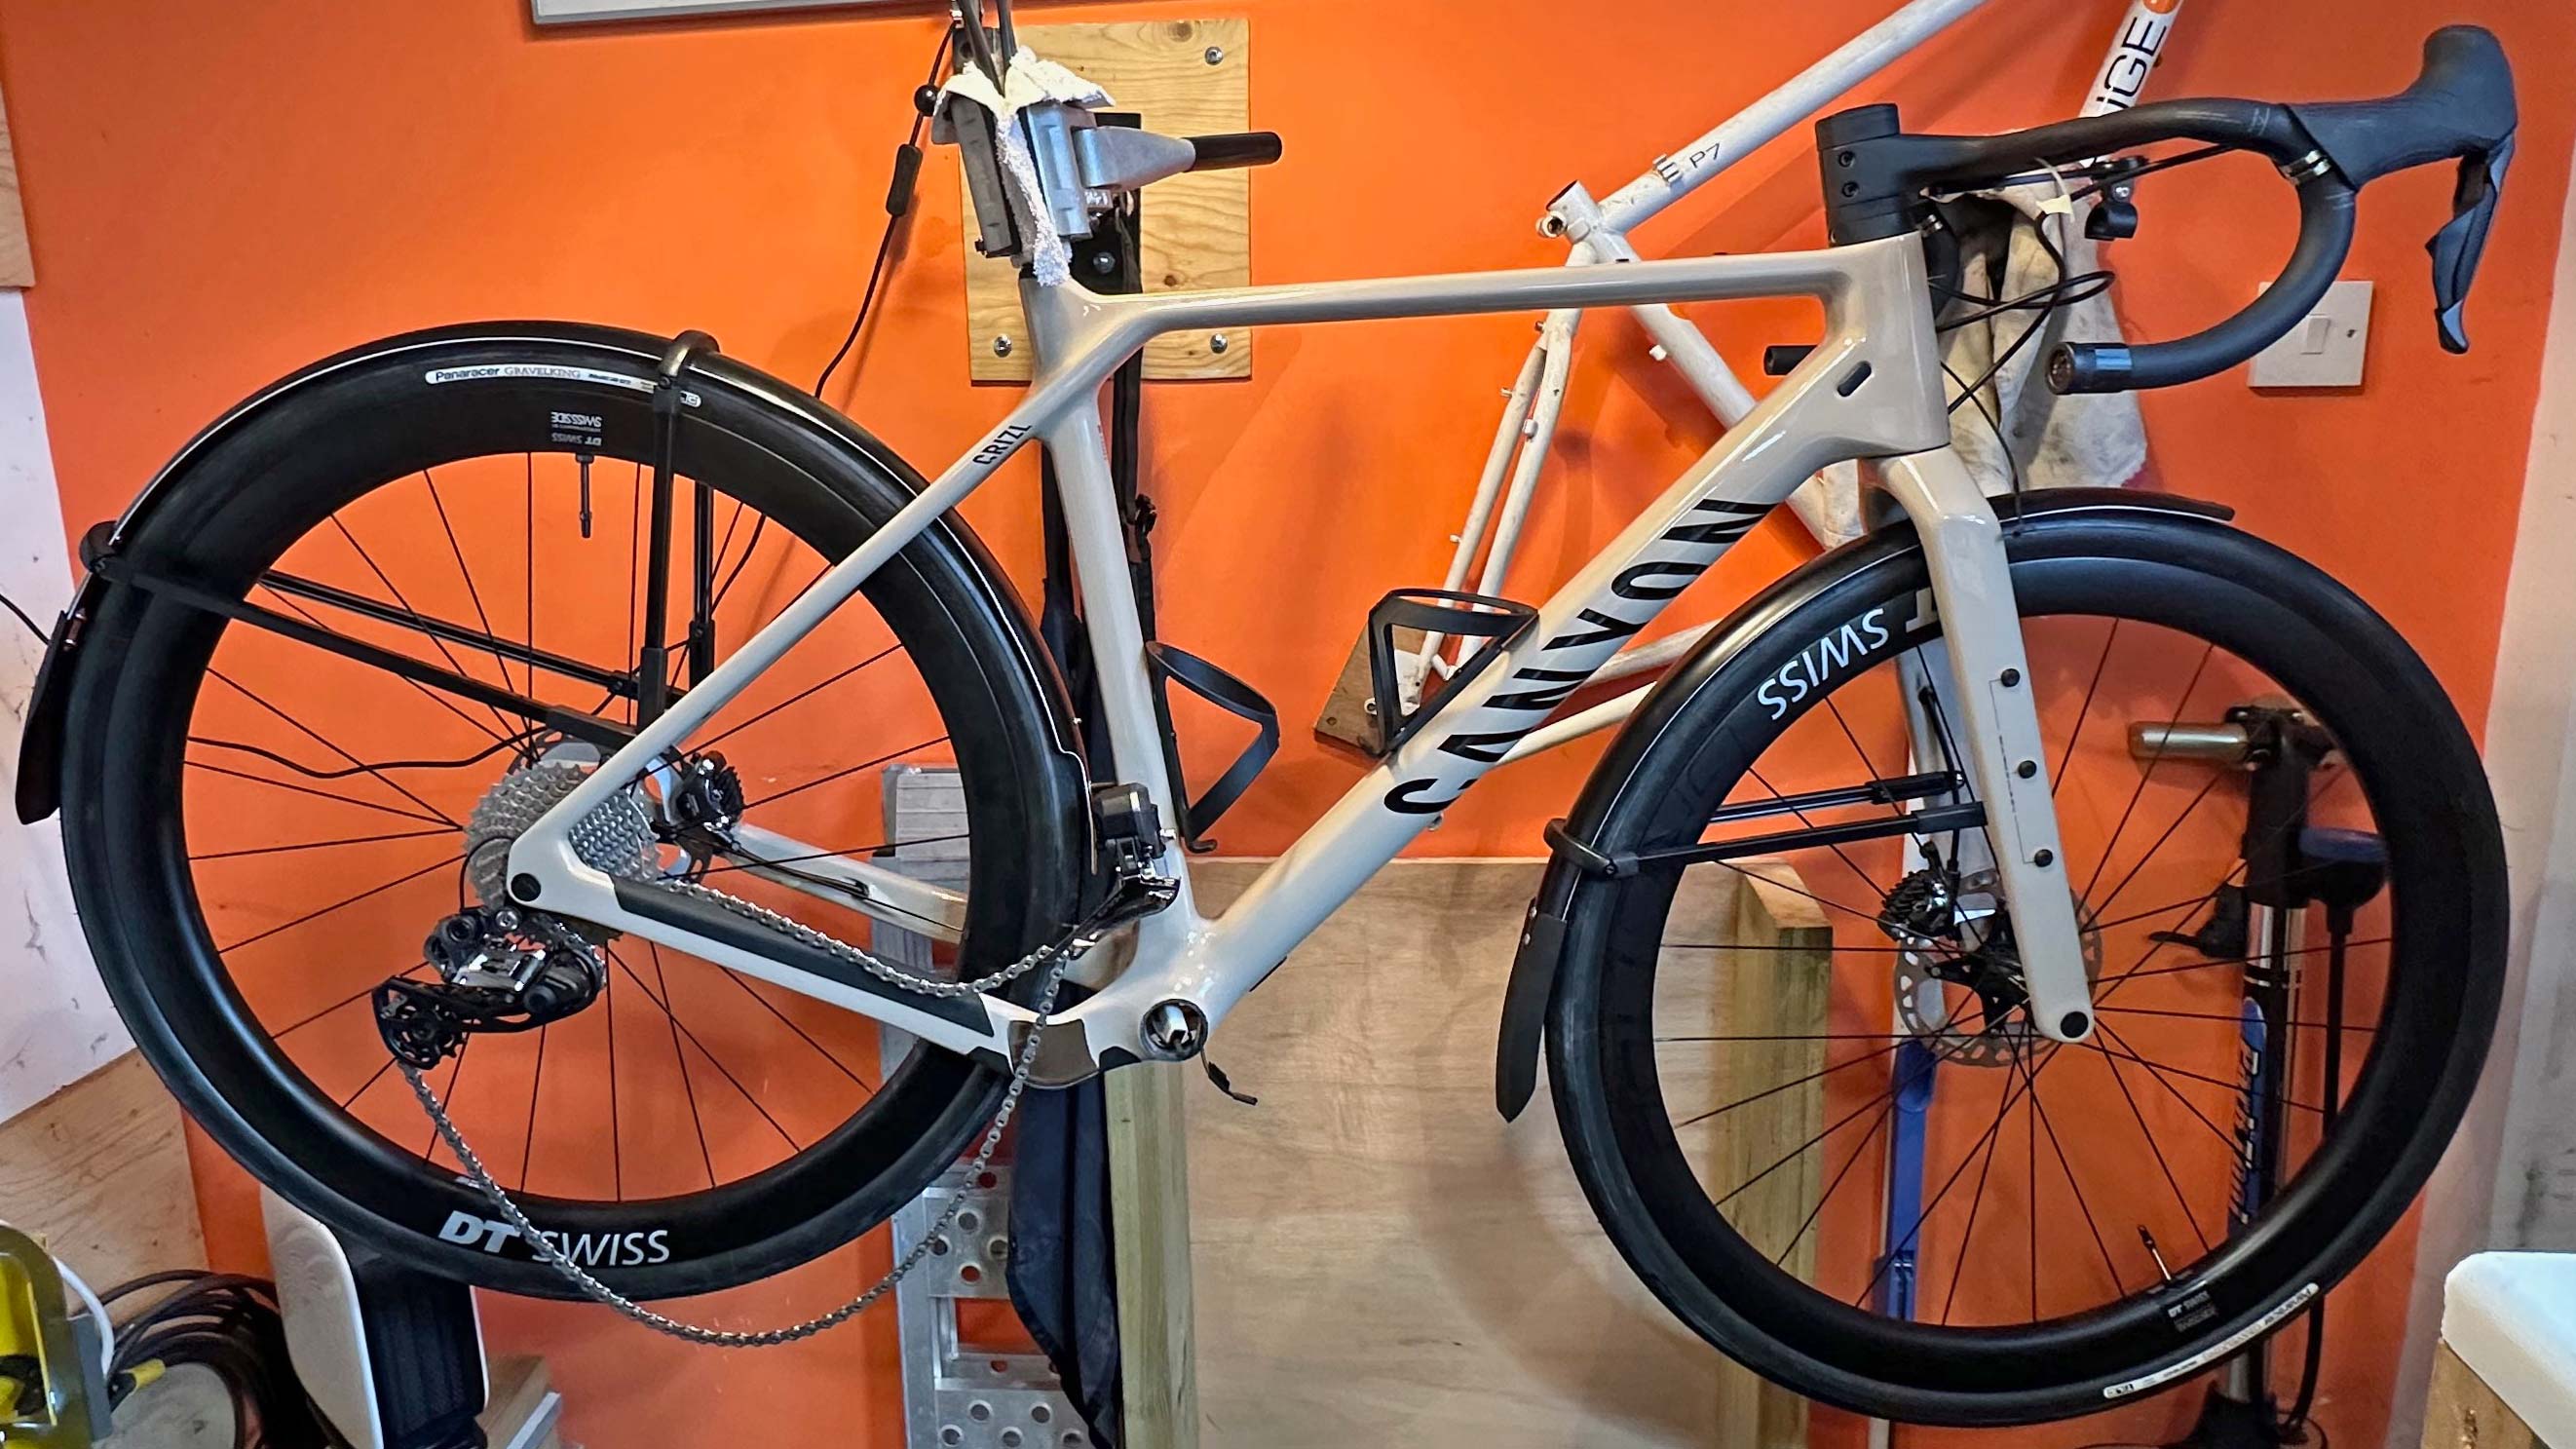
1st generation "All-road" build
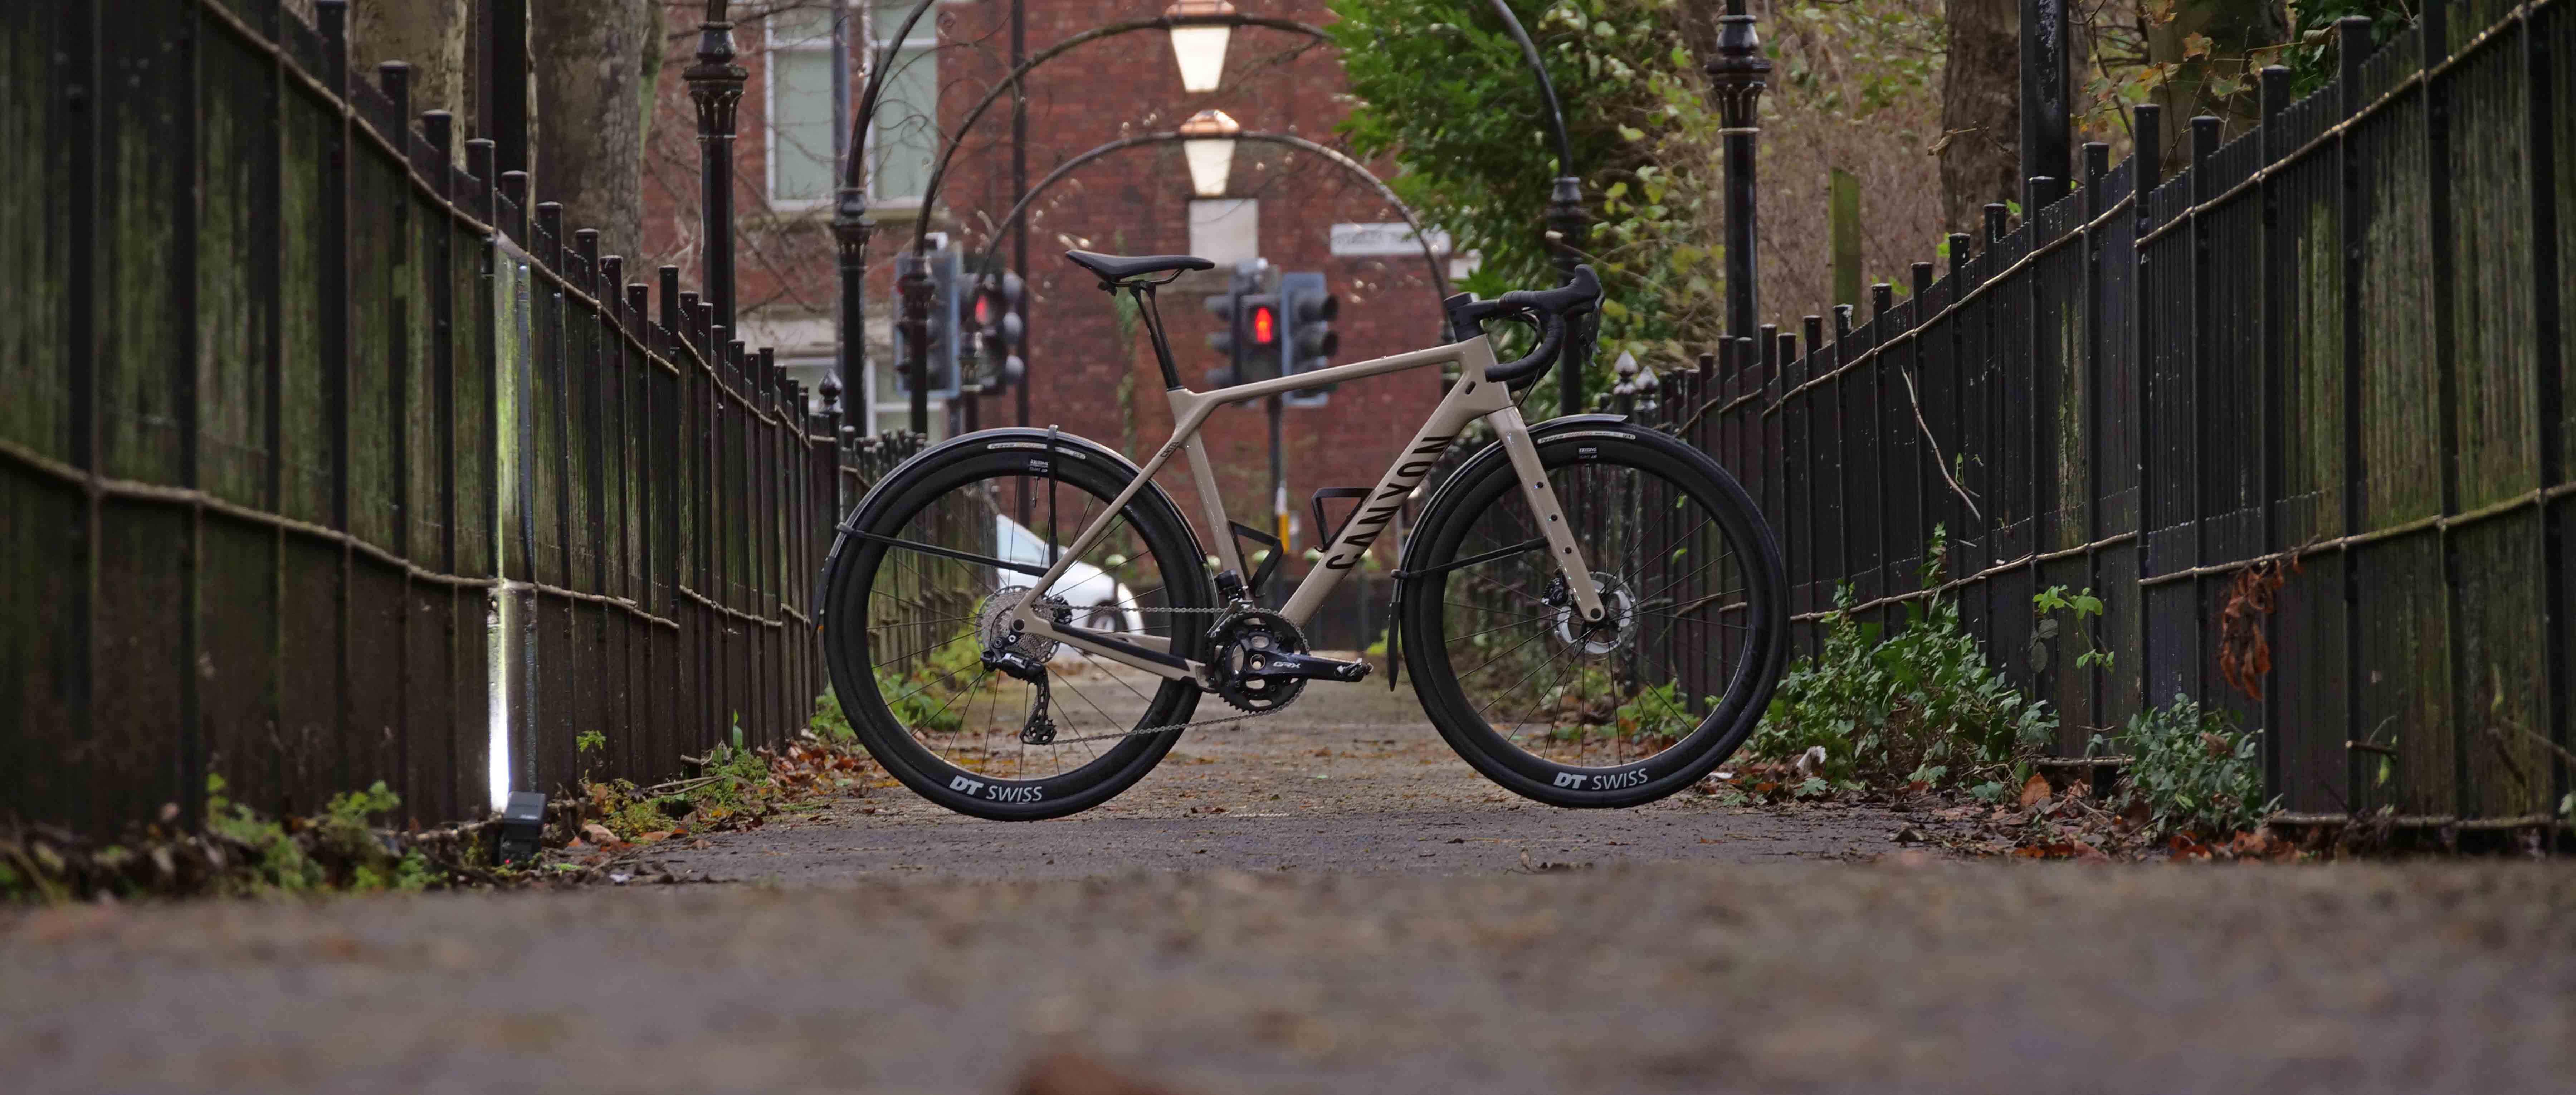
In the end, I mentally juggled all the different permutations and went for a Canyon Grizl. So why did I choose a bike which was designed to take 50mm wide tyres and which was aimed firmly at the more adventurous end of the gravel bike world? The answer was that it was the only bike that ticked all the boxes on my list. Having settled on a Grizl, I placed my order and then started work on my supplementary shopping list. Why the hell would I need to order anything else to go with the bike, you might well wonder? A few simple accessories like bottle cages and a bell were in my view essential, but then I started working on the more esoteric/fun stuff. This is where the bike pimping habit really kicks in.
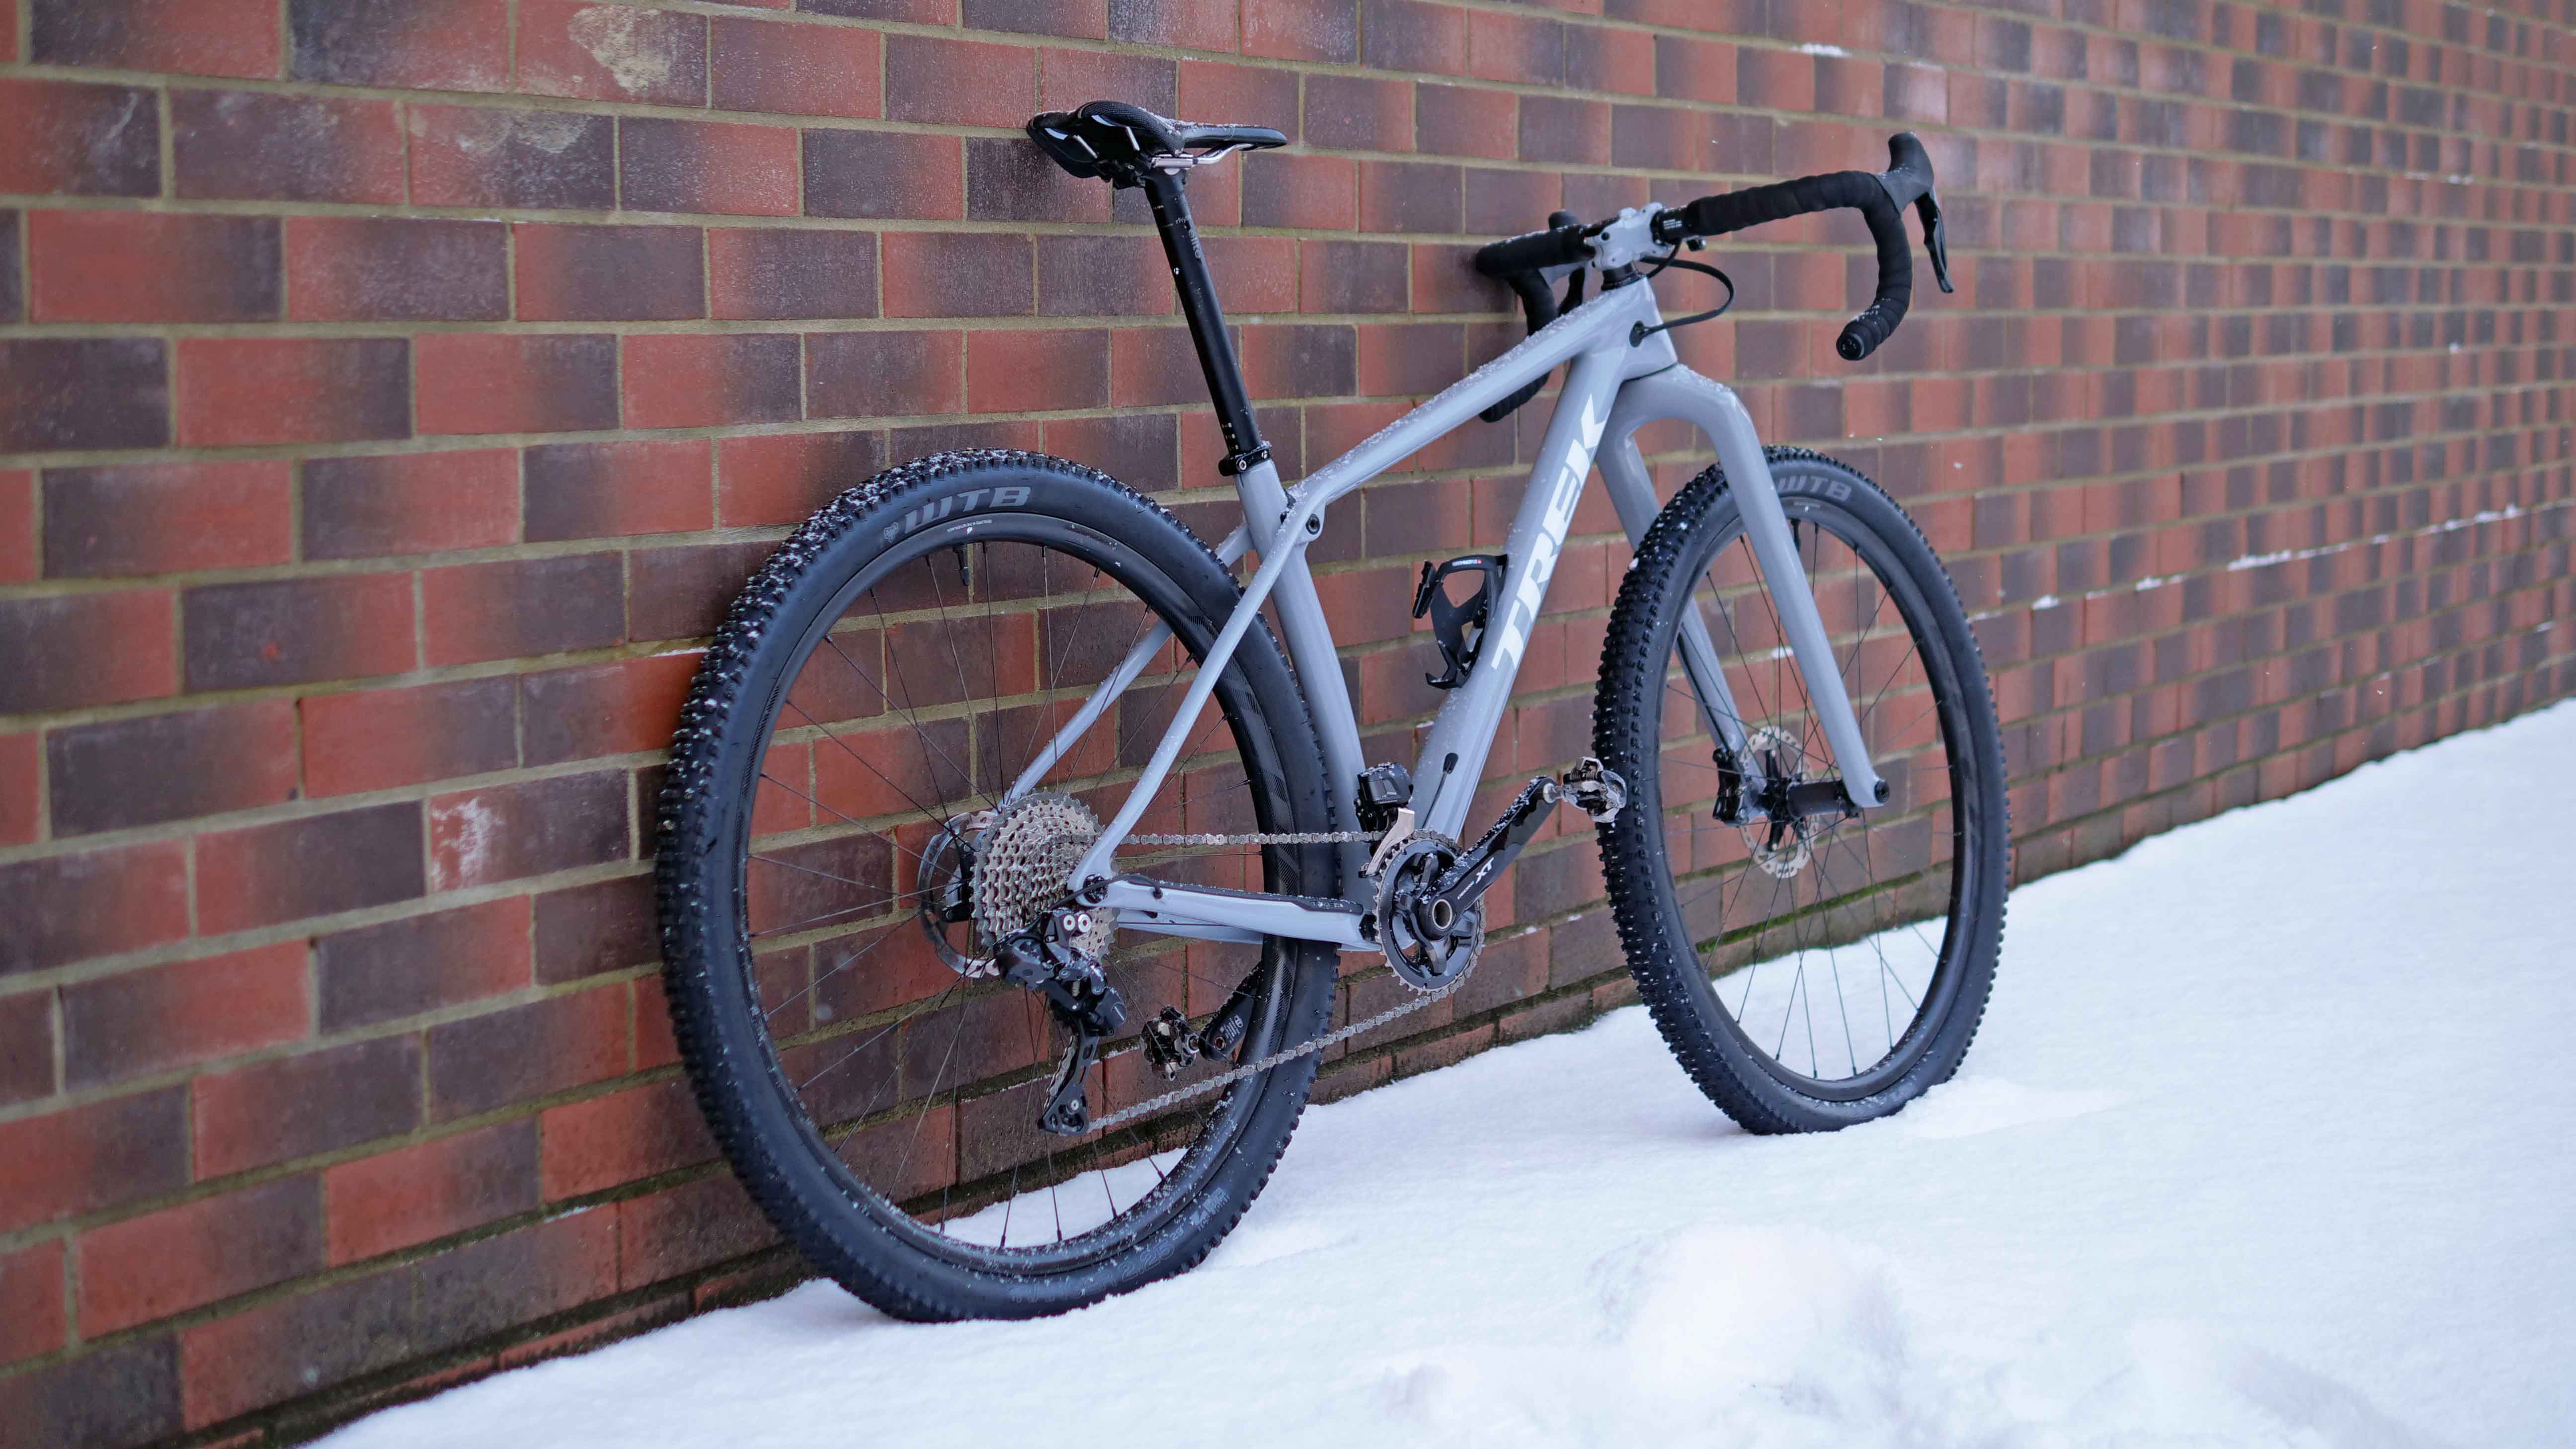
Monstercross in winter mode
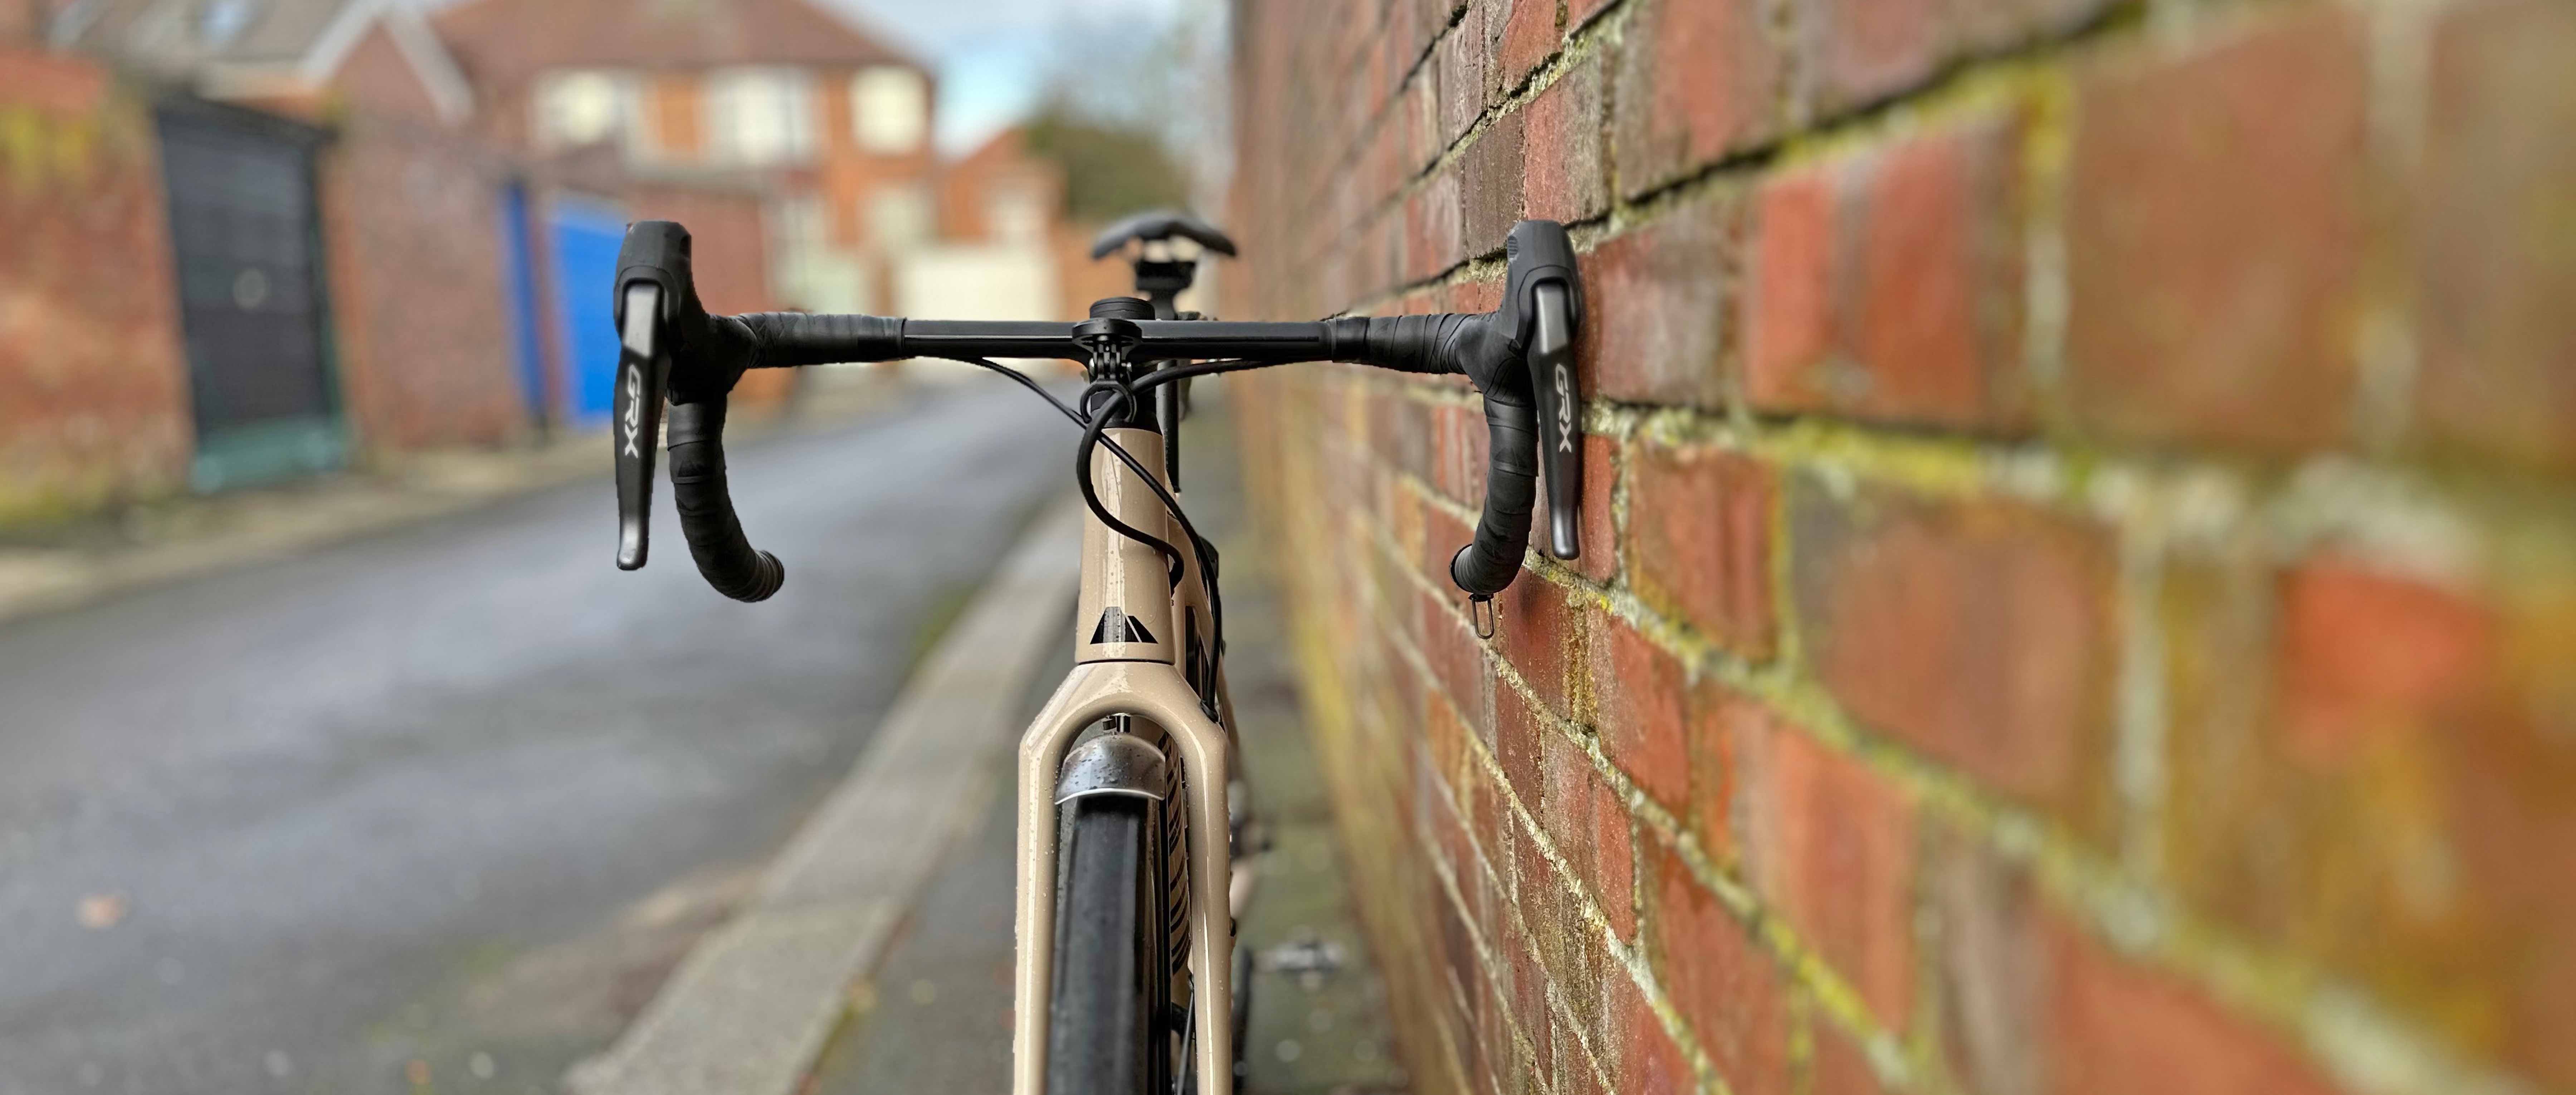
I’ve built enough bikes over the years to know that what I really love is something which looks smooth, slick and as close to a factory race team build as I can get. Seeing as my Grizl was a complete bike (unlike anything else I had owned in the last ten years), that made some of it easier, but I also knew I would want to tweak aspects of it straight from the box. It needed to have the stock gravel tyres changed for big volume slick road tyres. I was going to be fitting full-length mudguards. I needed an in-line seatpost rather than stock one with layback. The standard setup of the various hoses/cables from the handlebars to the frame looked a little “messy” and I thought I could streamline how they were assembled. I also had an irrational love of how one-piece bar/stem setups looked (and perhaps more importantly, I was hooked by how much comfort a good set of carbon bars added), so I budgeted for upgrading the cockpit straight from the word go. That gave me quite a long “To Do” list.
Thanks to the bike being in stock and speedy delivery from Canyon’s German warehouse, the bike and a box of accessories arrived quickly. My first job was to change the tyres and to set them up as tubeless – a bit of a faff, but you couldn’t pay me to ride a bike with tubes in anymore! Next came fitting the mudguards. Slightly fiddly due to a combination of tiny screws and the need to fit them precisely into the expensive and easily damaged frame and forks. I also added end flaps to the mudguards to increase their coverage and reduce spray for any riders following behind me. Off came the stock VCLS S15 seatpost and in its place was fitted the S14 in-line variant, as I knew I wanted the reach to be slightly reduced to better fit with my proportions.
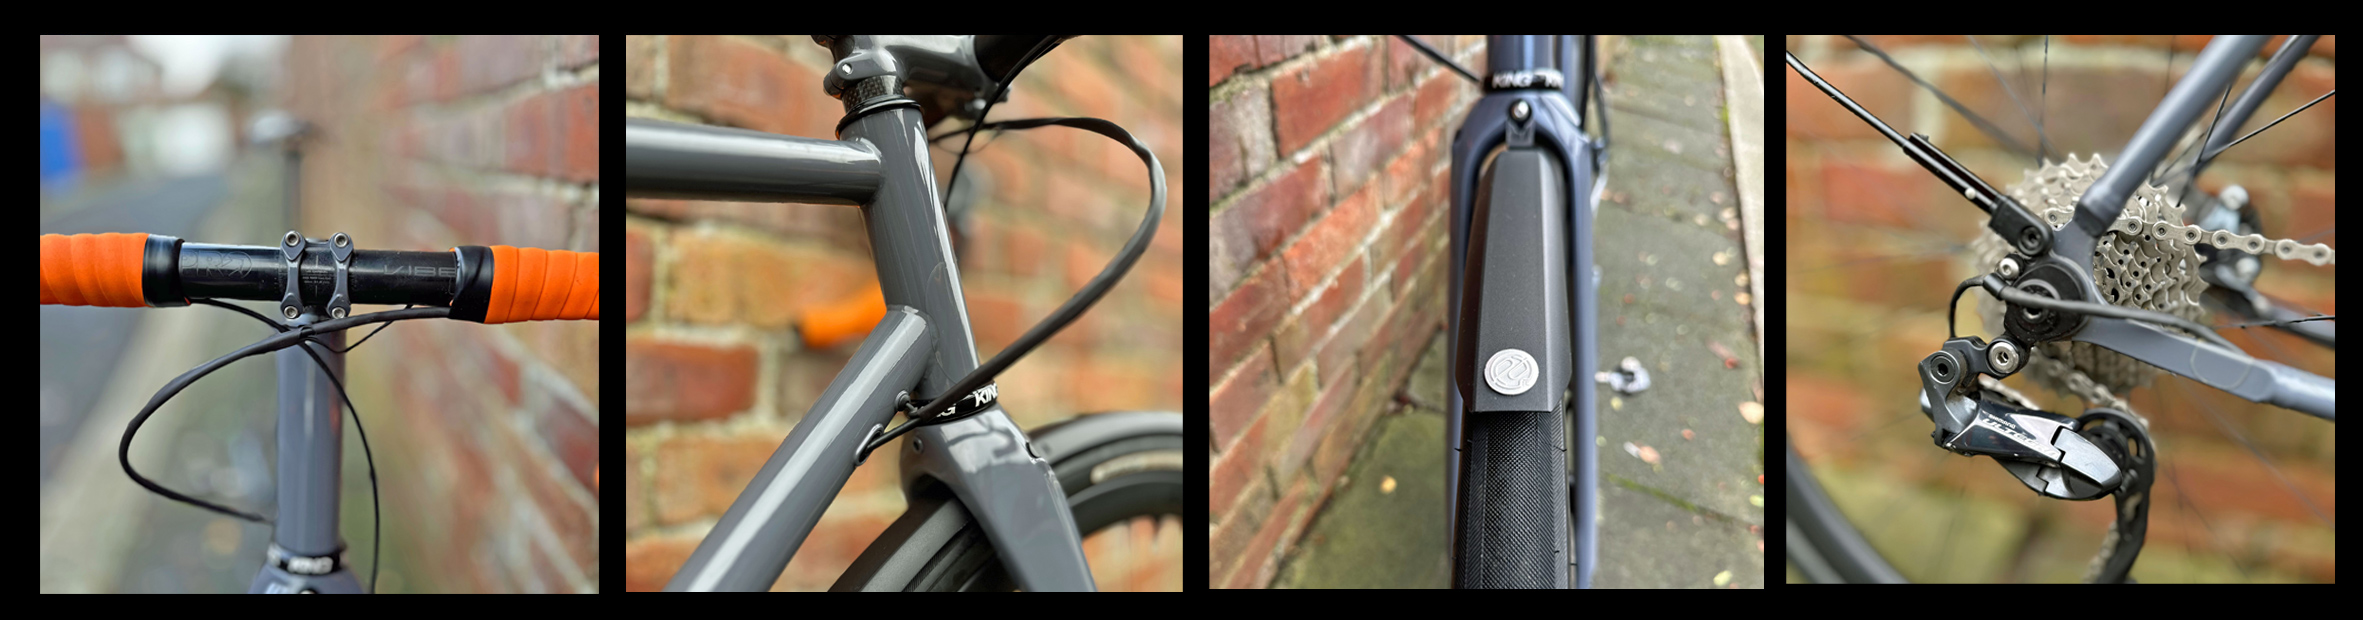
Next came the most difficult to justify part – taking off the perfectly good ‘stock’ handlebars and stem and replacing them with a set of carbon one-piece ones. They’re stupidly expensive but offer a lot more comfort and they look amazing. On a bike which I hope to have for years, if not decades, this profligate purchase was slightly easier to justify (in my mind anyway) when I hoped it would give me years of riding comfort. The existing bar and stem came off easily and then were replaced with a set of aero spacers and the new carbon cockpit. Nothing too difficult, but while I was there, I removed the headset bearings and greased them using carbon-friendly grease. The headset spacers were temporarily re-fitted, before some subsequent adjustment (and likely a trimming of the fork steerer) after some extensive test riding, to obtain the Goldilocks combination of not too many spacers, but also a sensible stack height to ensure the finished ride was comfortable.
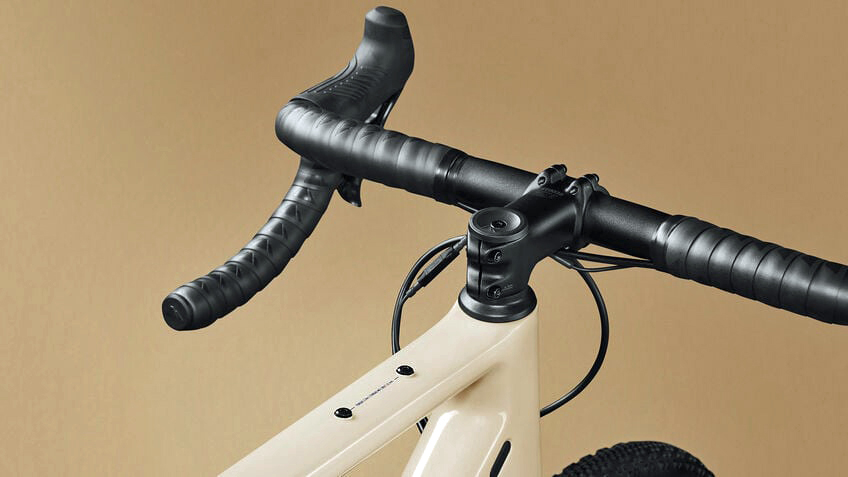
Before – image courtesy of Canyon
After
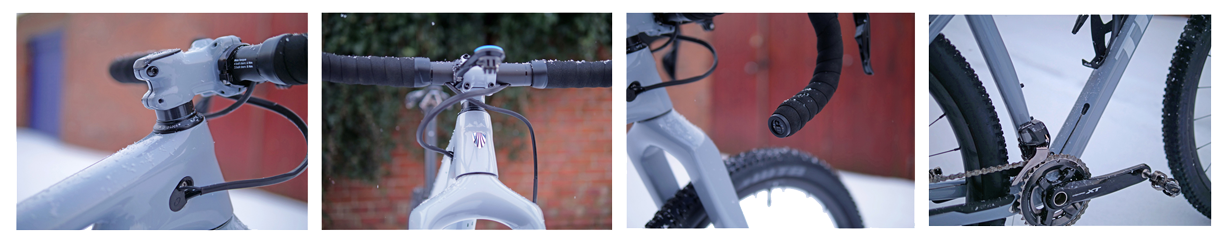
At the same time as fitting the bars, I also wanted to improve the look of the cable routing. The stock set-up included two main Di2 cables – one which ran internally up the downtube, through a two-way junction box and then into a Y-shaped splitter cable which ran across to both the left & right shifters. This worked perfectly, but the spaghetti tangle of wires jarred with how I wanted the front end of the bike to look. Instead of the stock setup, I replaced the main Di2 cable with a significantly longer one that ran the full length of the downtube from the bottom bracket shell right up to the left-hand shifter. This meant removing the cranks, pulling out the bottom bracket and then carefully replacing the stock Di2 cable with the new one.
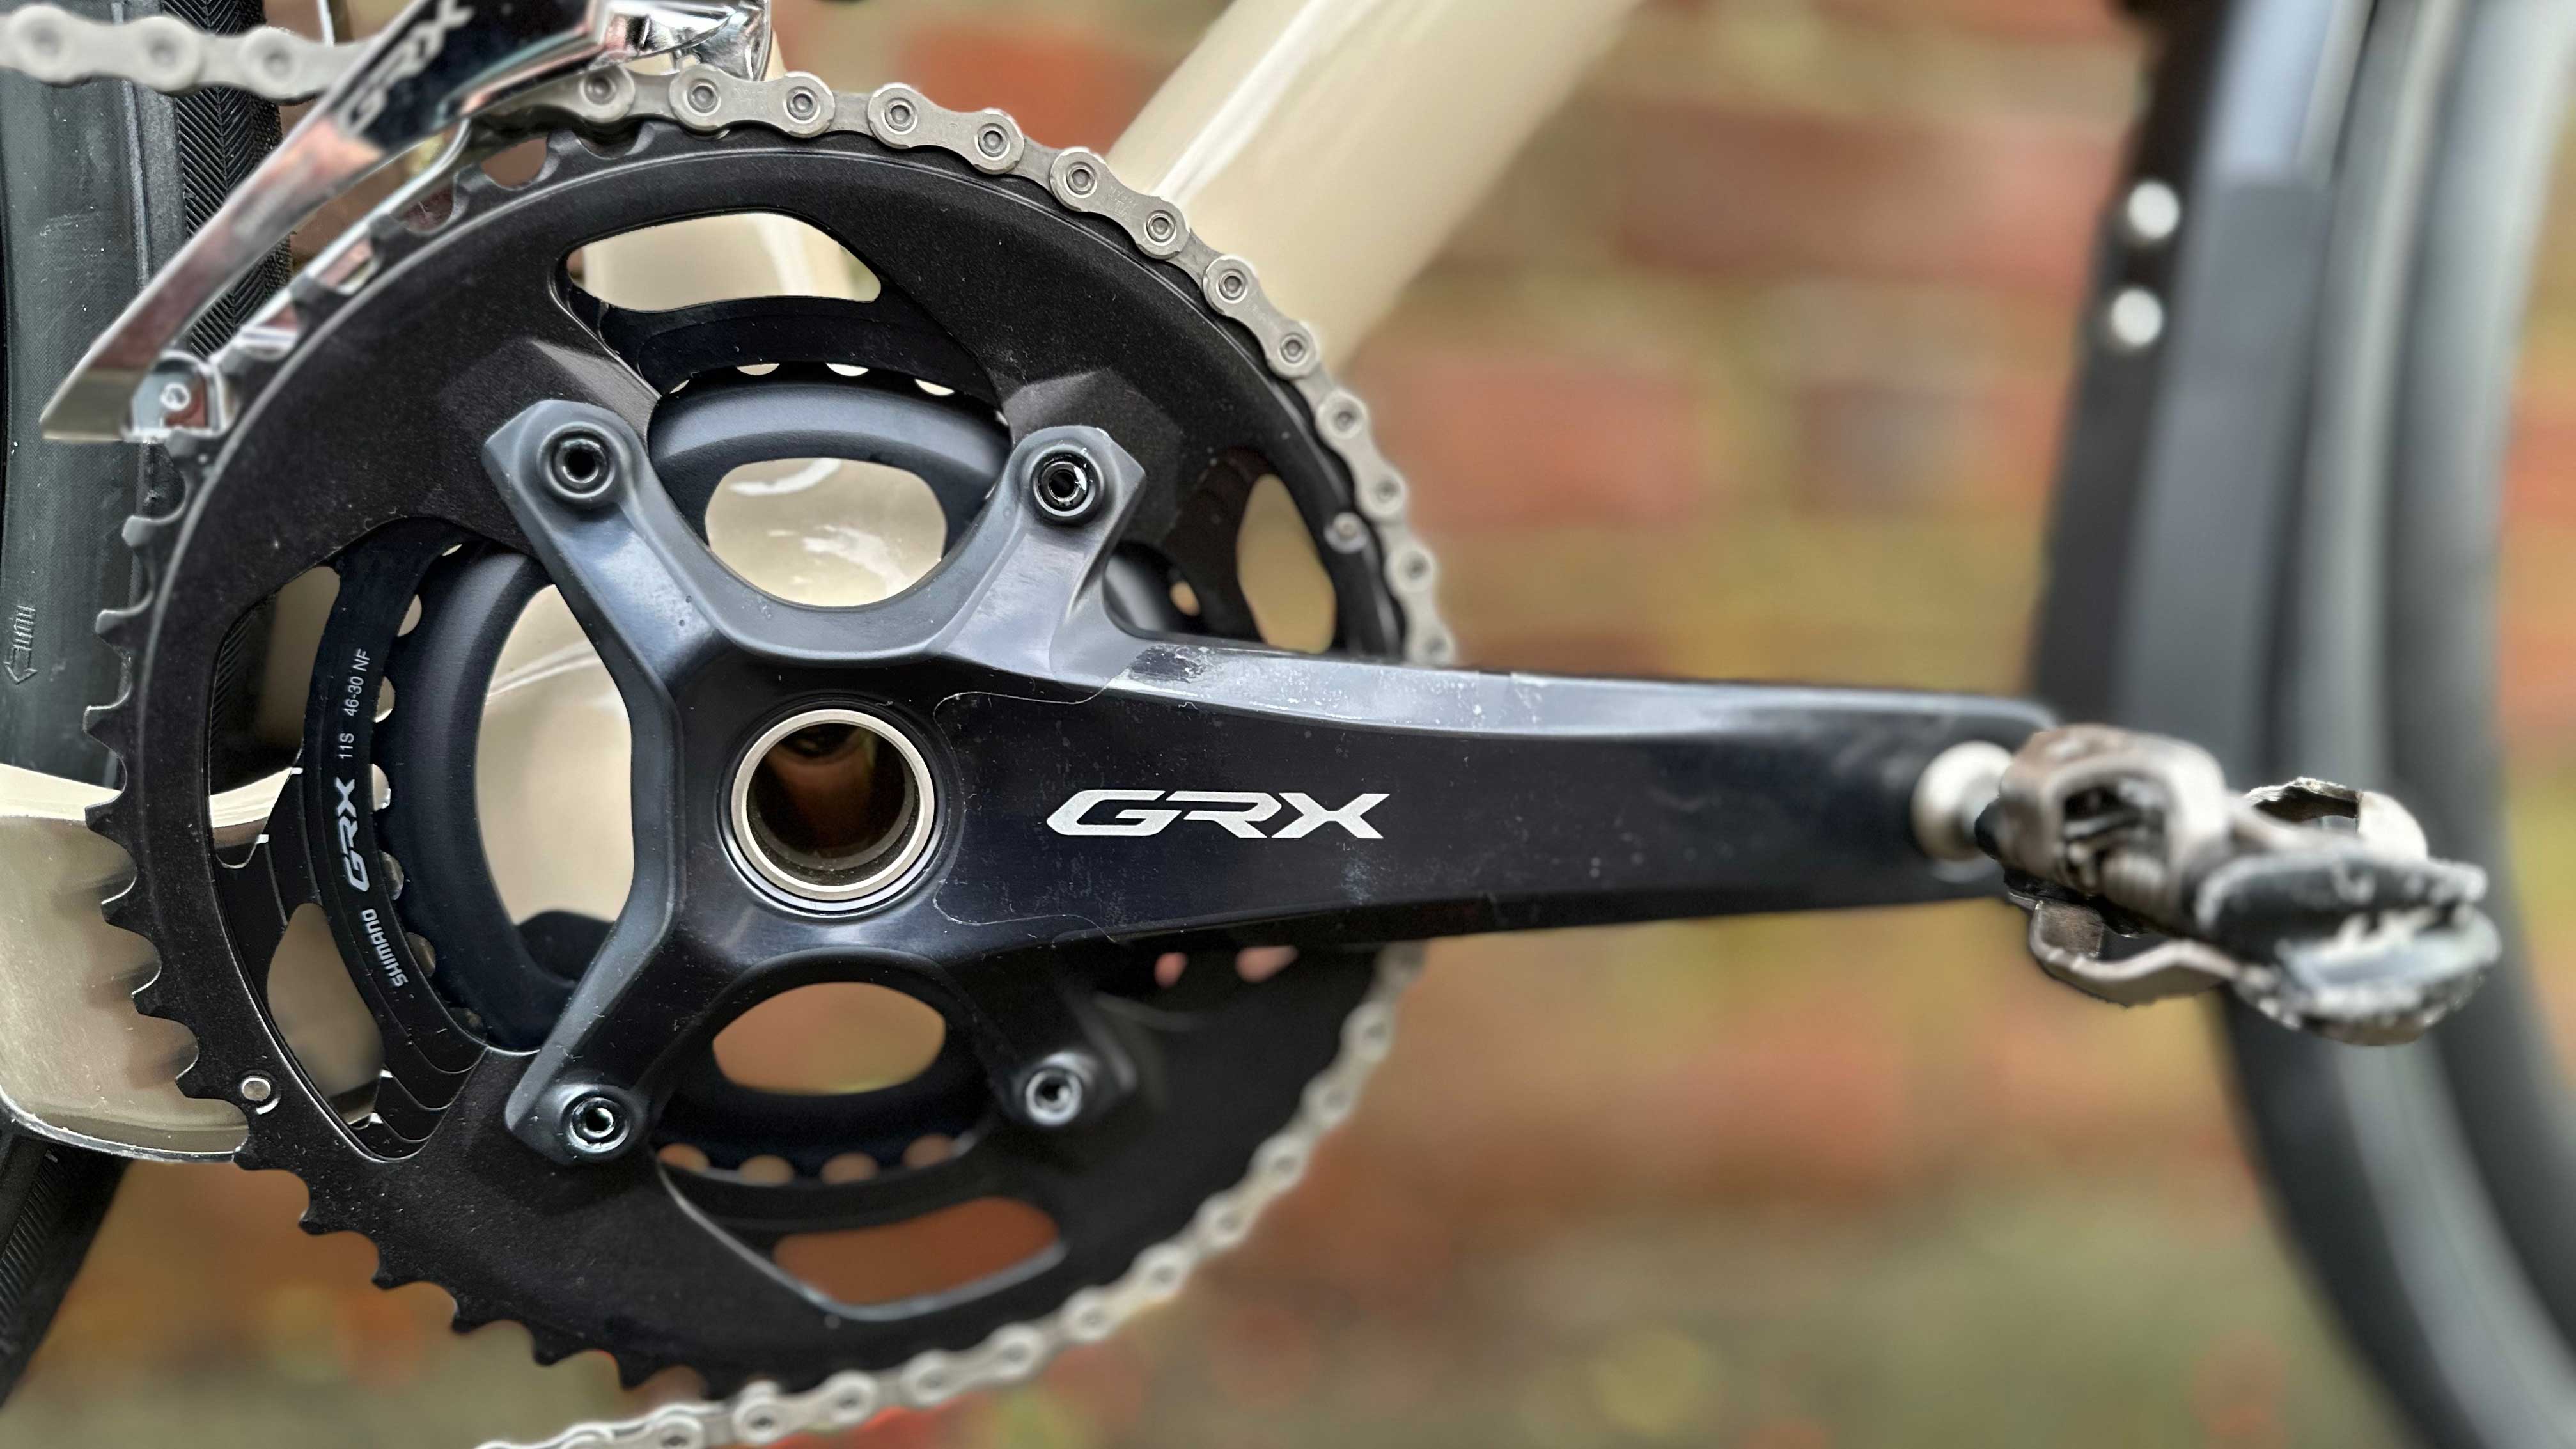
While the chainset was off, I removed the stock 48 tooth GRX800 chainring and in its place went a smaller 46 tooth GRX600 version. While many purists might roll their eyes or suck in air through their teeth at this, I know from experience of riding a Grail that I’m much happier spinning a 46 tooth big gear, rather than pushing a standard 48 tooth one. I also took the opportunity to add helitape to both cranks arms, hoping to protect the easily damaged black finish. Many people wouldn’t bother with the faff of doing this, but it helps increase the longevity of the good looks of the bike, so in my mind is worth the effort.
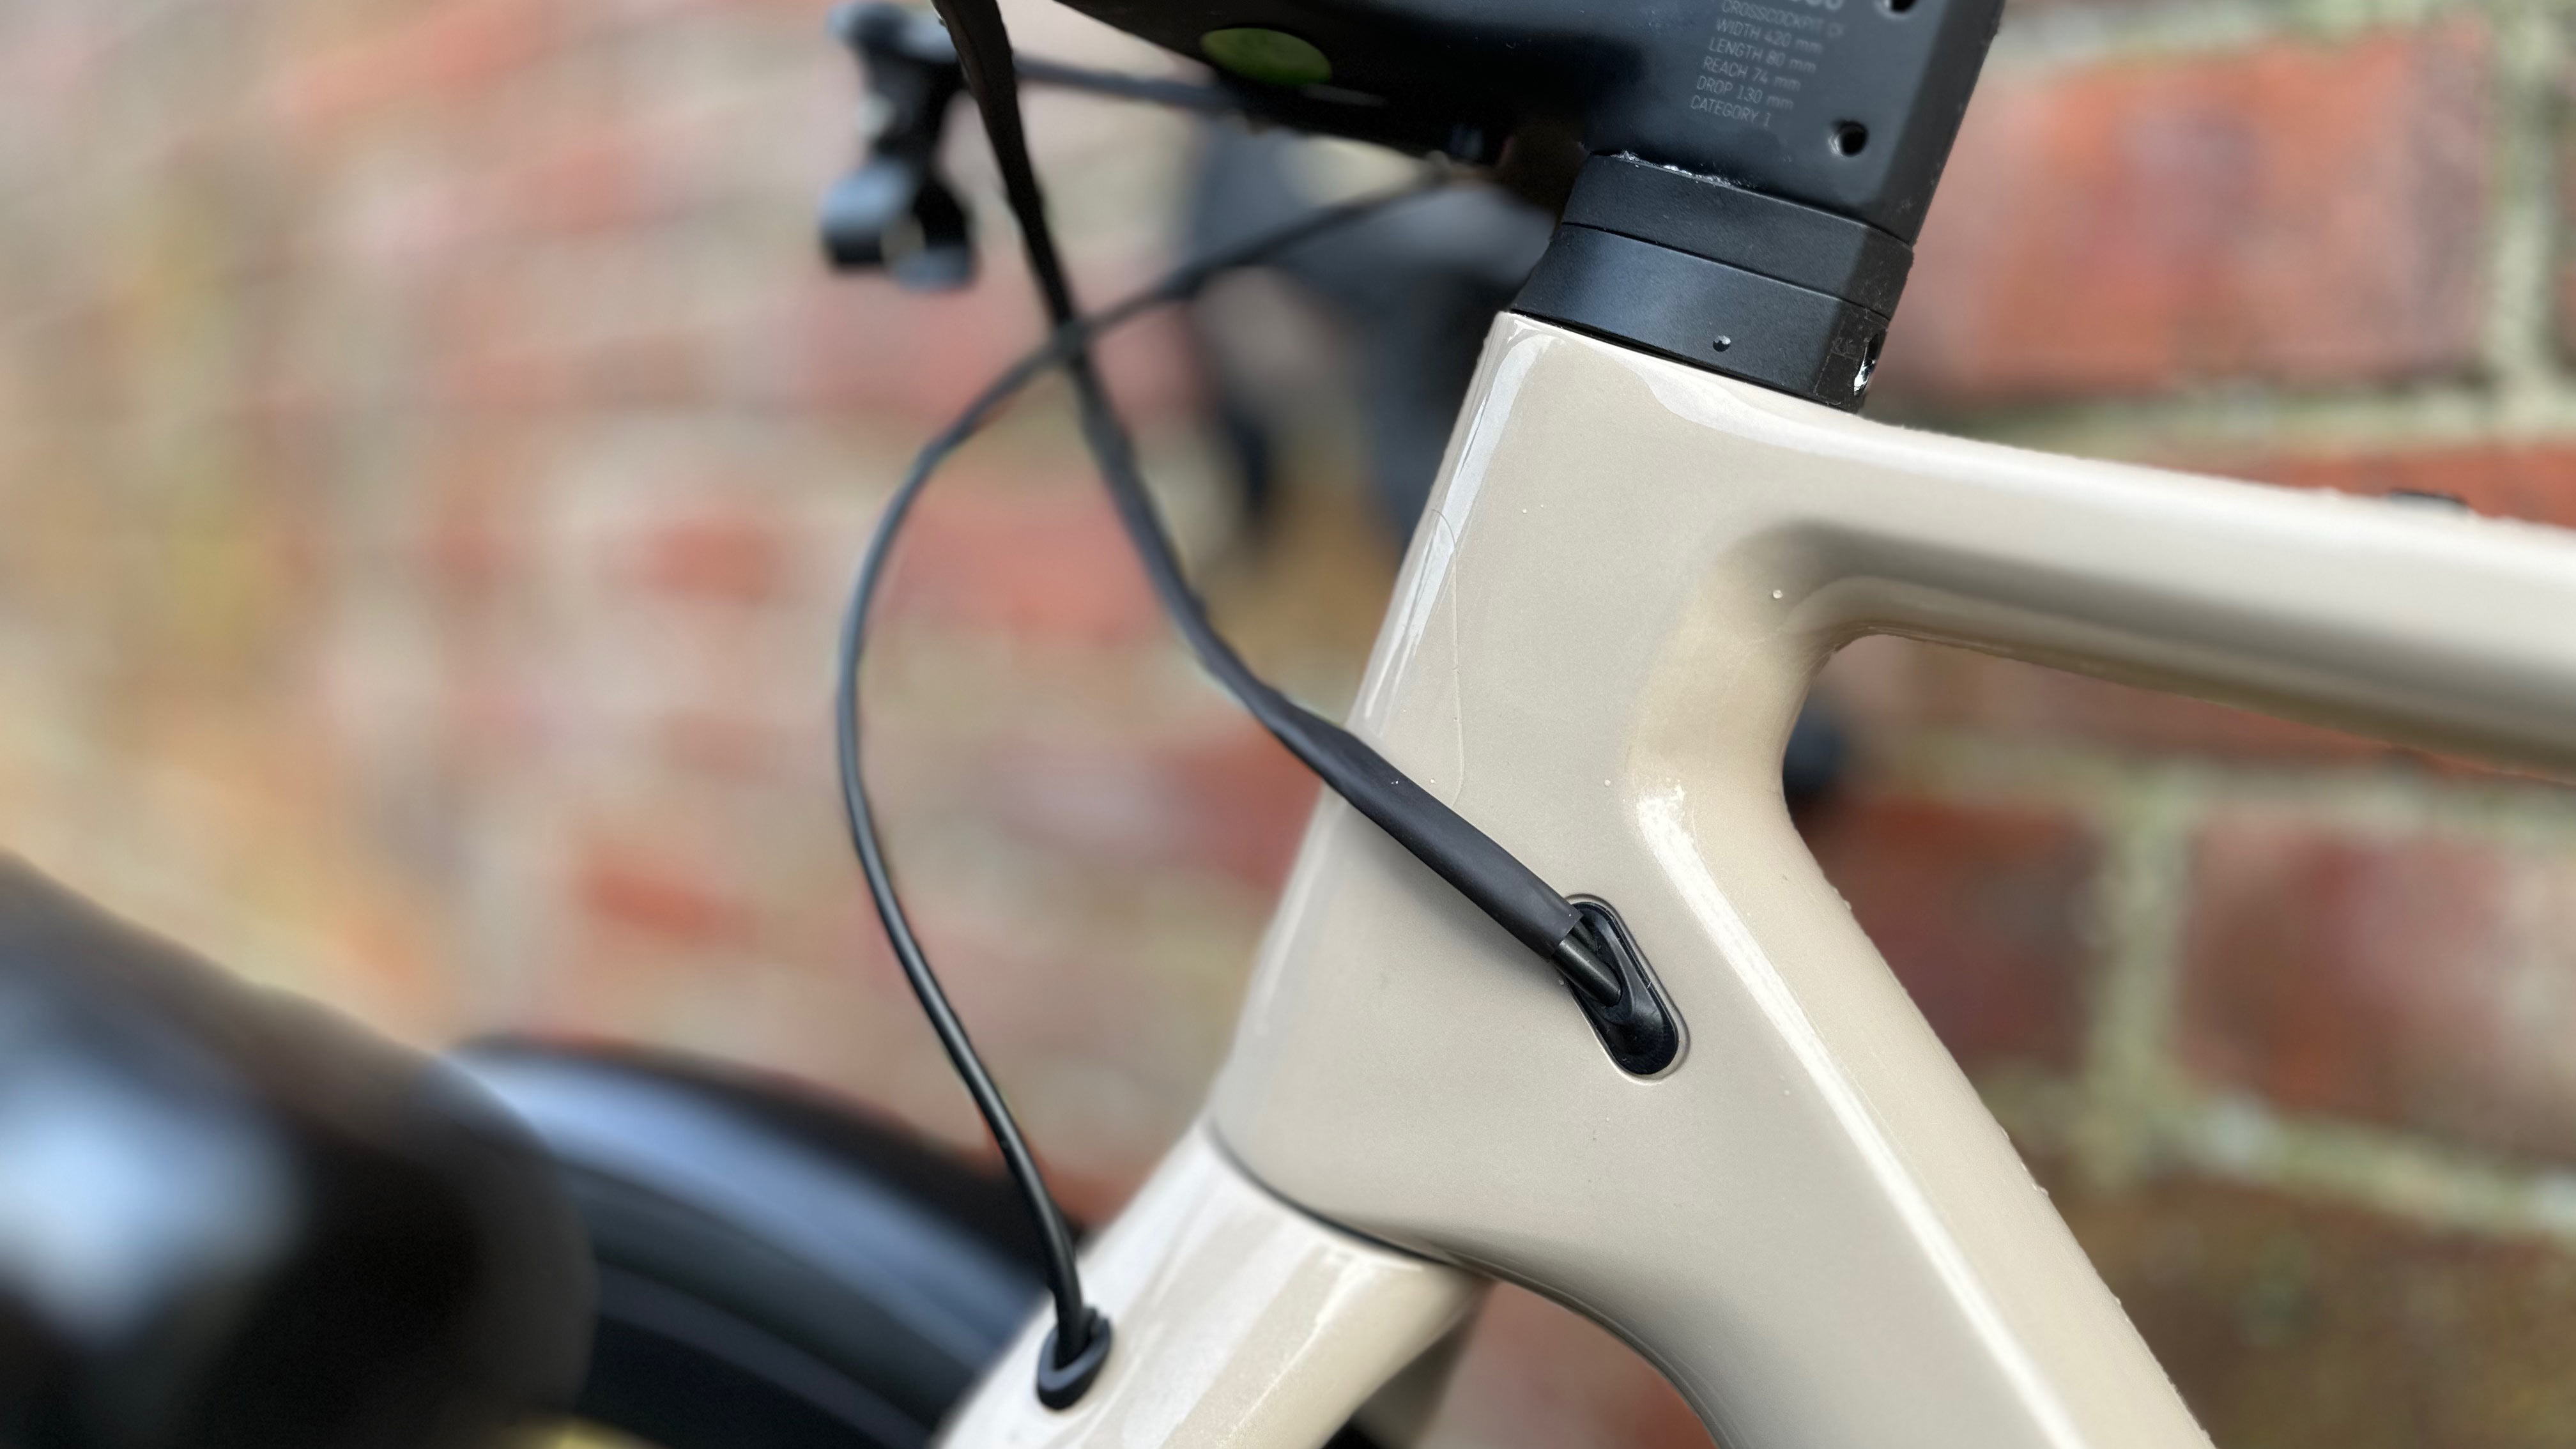
Where the rear brake hose and Di2 cable exited the frame near the head tube, I used a length of heat-shrink to encapsulate the two and run them smoothly up to the bars. In order to fit the heat-shrink, I had to first cut the end off the left-hand brake hose, loosely fit the heat shrink and then fit a new barb and olive, before re-assembling the hose into the lever and sealing the heat-shrink encased hose/cable to a smooth finish.
Suddenly you can see why the modifications took me so long. Even a task like removing the cranks and the bottom bracket and replacing the Di2 cable, while not unduly complicated if you have the right tools and knowledge, all added time to the process. Finally, I ran a second Di2 cable through the centre of the bars from the left shifter to the right one and added a second shorter cable down through inside of the right-hand side of the bar to the bar-end junction box. With everything in place, I did some careful testing to make sure the shifting and brakes worked perfectly, before moving onto the final stage.
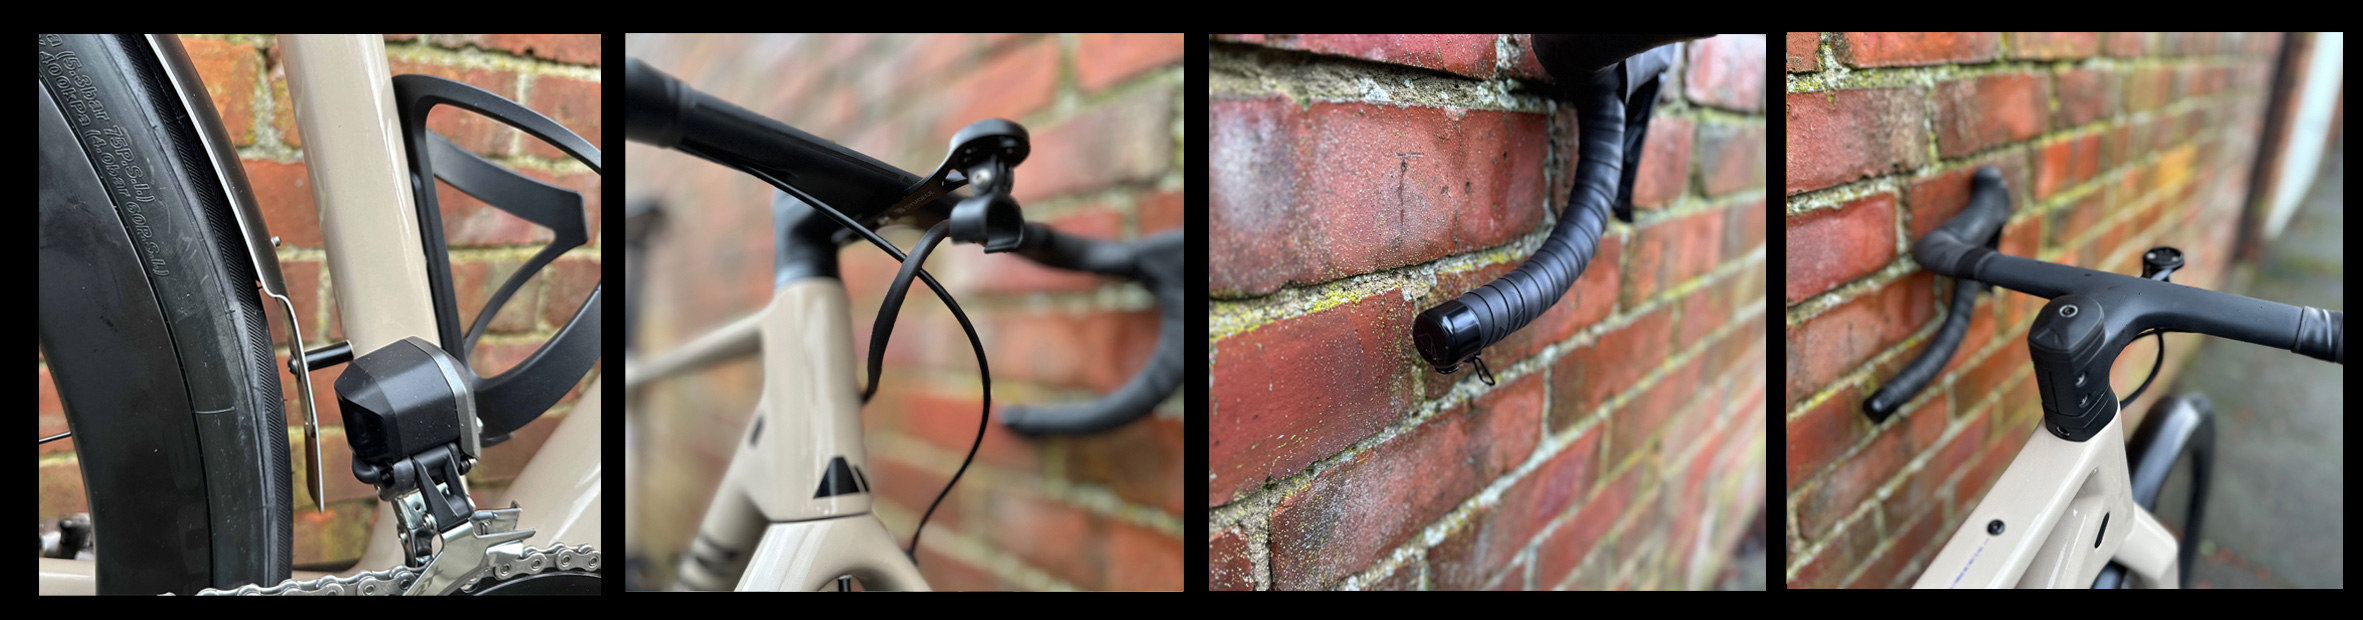
With the major work done, my final task was really just tinkering around the edges. I fitted the bar tape, bottle cages and bell, plus some carbon covers under the bars which help to hide the brake hoses and give a more polished finished look. Next, I broke out the heatgun again and added judicious amounts of helitape to any areas of the frame and fork that I thought would be prone to rub.
I didn’t keep an exact tab of how long the work took, but one evening at least I didn’t finish until 11.30pm. Many people would ask, not unreasonably, “Why do you bother?”. A good question! Why take a perfectly good (and well set up) bike and then essentially dismantle it and re-build it again? I, like many inveterate bike modders, probably do it for a number of reasons – wanting to tailor the bike precisely to how I like it, wanting to make sure everything is assembled properly, wanting to give it those “factory race team” finishing touches and probably also if I’m honest, because I really enjoy the process!
Modding your bike is a very slippery slope. You’ll start off with some stickers or a new bottle cage and before you know it, entire days of your life will evaporate as you tinker and fettle. The job is never finished either. You’ll always think of “just one more” little tweak to make to your perfect set-up. But in the process, you’ll improve your mechanics skill, you’ll get to know all the inner workings of your bike and you will get that rosy glow of achievement when one of your friends notices some minor improvement that you spent an entire weekend trying to put together.